
Welcome, new (and old) mechanical keyboard nerds!
If you want to easily improve the look, sound, and feel of your mechanical keyboard, you’re in the right place.
Even the smallest mods can make the world’s difference to your typing experience, and you might just realize that you’ve found your new favorite hobby.
Ready to learn some keyboard mod basics and take your keyboard to the NEXT LEVEL with some super easy (and fun) modifications?
Let’s start modding 😉
Should You Modify Your Mechanical Keyboard? (A Quick Warning)
Hold up. Before we dive deep into the sea of keyboard modding, you must be aware of the potential risks that come with modifications.
Now don’t let this put you off; all of the mods mentioned in this guide are well within your capabilities, especially with the help of some video tutorials. Reach for the stars!
Making it worse
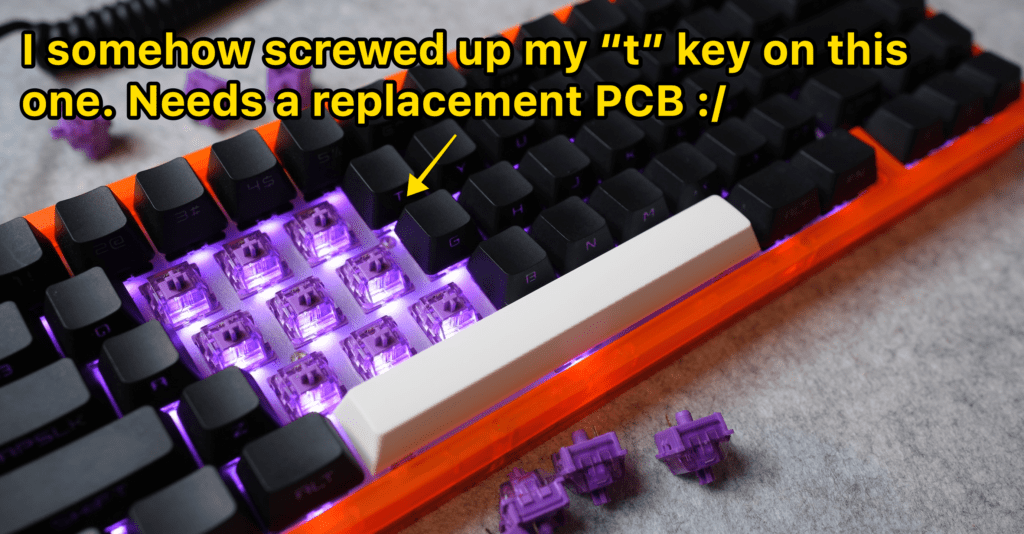
While it may be tempting to make huge complicated modifications to your keyboard’s PCB (printed circuit board) after beginning to get the hang of some basic mods, just don’t.
There’s a pretty big risk that you’ll end up making things worse, especially if you’re new to keyboard modification.
(seriously, take your time and do things right! I’ve screwed up more than one keyboard trying to mod stuff)
Wasting cash
You also run the risk of wasting money by making mods yourself.
If you accidentally break the switches, buying replacements or paying for repairs isn’t going to be cheap. Some of these damaged parts can be expensive, especially if you’re trying to stick to a tight budget!
Voiding the warranty
Most keyboards come with a warranty, but if you send back a broken keyboard with any sort of modifications, you’re probably not going to get a refund or a replacement.
On the other hand, if your warranty has already expired, or you especially bought a cheap keyboard for making modifications, this obviously won’t be something to worry about.
Swap Out Your Keycaps
| Difficulty: | Super easy |
| Cost: | $40-100 (cost of keycap set) |
| What you need: | A keycap puller, and new set of keycaps! |
If you’re just here for the aesthetics, listen up! Your opportunities to get creative with the keycaps are endless, and keycaps are super easy to swap out.
Whether you want to simply match your keyboard to your PC, hop on a popular trend, or get fancy with unique artisan keycaps (different-shaped, sculptured keycaps) – it’s entirely up to you (and your budget).
ALSO–upgrading your keycaps can also improve the feel and sound of your keystrokes.
Here are a few budget keycap sets we recommend:


Want more? Check out our full list of the best keycaps for 2023!
Related: What are doubleshot keycaps? Are they better?
Swap Out Your Switches
This is where it gets even more exciting!
| Difficulty: | Easy |
| Cost: | $20-50 (depends on how many switches you need) |
| What you need: | To research what type of switch you want, then pick up a pack! |
Want a quieter, smoother typing experience? Or maybe you enjoy a more tactile typing experience accompanied by that satisfying “click-clack” sound?
You can easily achieve the feel and sound you desire by changing to different switches.
An Overview of Mechanical Switch Types
When it comes to choosing a switch type, there are TONS of different options!
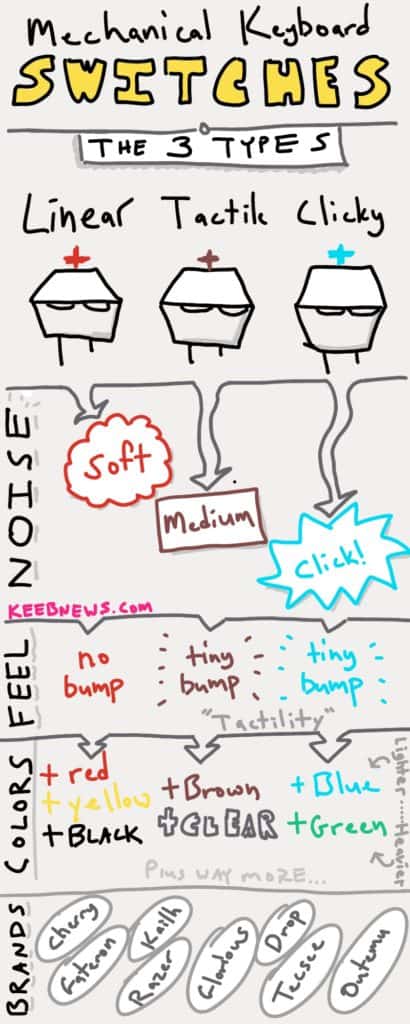
All mechanical switches can be classed according to the following 3 categories:
- Linear: The most basic of them all. When you press the key, it’s a straight, clear path from top to bottom. They don’t require much force for activation, and there isn’t any tactile audible reaction. These are usually preferred for gaming as they’re quieter, and the actuation force is fast.
- Tactile: Ever felt that tiny bump after hitting a key on certain keyboards? It’s likely got tactile switches. These help your fingers to ‘feel’ when a key has actually been actuated.
- Clicky: A branch of tactile switches. You feel the tiny bump and hear a tiny clicking noise when pressing a key. This kind of switch is typically louder.
Different colors are used to identify types of switches, for instance, red or black for linear switches, brown for tactile switches, and blue or green for clicky switches.
I could go into even more detail on types of switches, but that calls for another guide dedicated entirely to Mechanical Keyboard Color Switches. Cherry MX is one of my favorite go-to brands for mechanical keyboard switches, but I love Kailh and Akko too!
- Akko Matcha Green (linear)
- Gateron Milky Yellows (linear)
- Kailh Box Jades (clicky)
Those are my all-time favorites, but see the guide (linked above) for way more!
Important Note: If your keyboard is “hot-swappable,” that means you can easily remove the switches from the PCB WITHOUT taking your keyboard apart (you’ll still need to remove the keycaps). If you don’t have a hot-swappable keyboard, you’ll have to take apart your keyboard and also de-solder the old switches. It’s a pain!
Lube Your Switches (and/or add switch films)
| Difficulty: | Medium |
| Cost: | $12 for lube supplies |
| What you need: | Lube, a small brush, patience! |
If you’re happy with your existing switches or don’t want to buy new ones just yet, another easy way to improve your keyboard is to lube the switches.
Trust me; it can make a MASSIVE difference in how your keyboard sounds and feels.
Smoother typing and gaming, fewer key wobbles, and no more annoying scratchy noises.
What You’ll Need to Lube Keyboard Switches
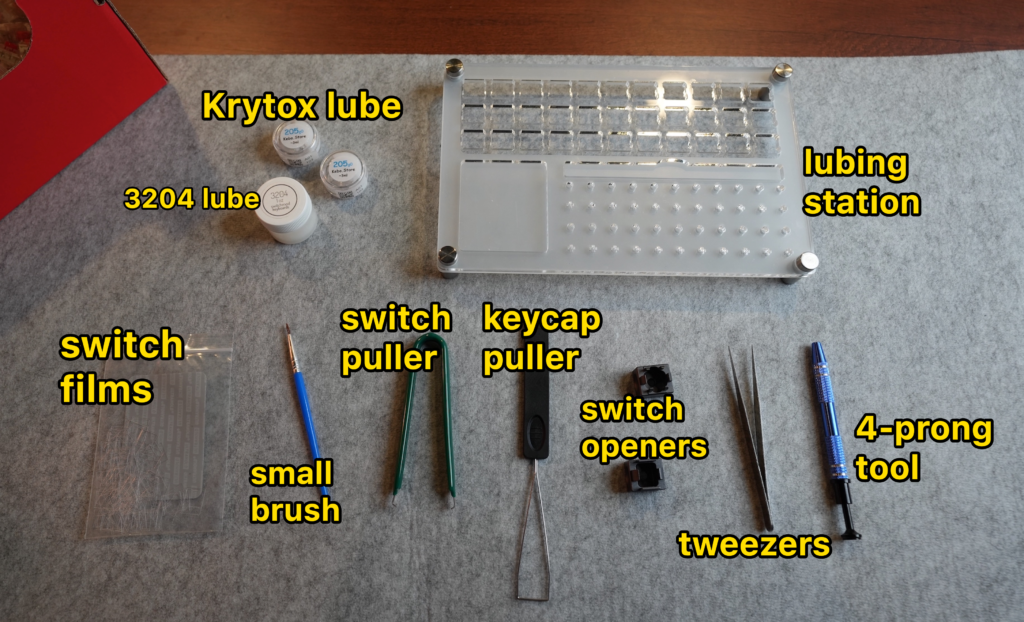
Here’s what you’ll need:
- Lube
- A small paintbrush
- A switch opener
- A switch puller
- A keycap puller
- Tweezers.
Top tip: It’s crucial that you pick the right kind of lube to match your switches. For tactile switches, go for a lower viscosity (thinner) lube. And for linear switches, you will want a higher viscosity (thicker) lube.
As a rule of thumb, DO NOT lube clicky switches. This will only destroy the tactility. Not good.
How to Lube Mechanical Switches
You might be surprised to learn that this process is actually pretty simple, and you may end up thoroughly enjoying it!
Here’s how you can use lube to get your keyboard feeling and sounding satisfactory in no time:
- Remove the keycaps
- Remove the switches and disassemble them
- From top to bottom, lube every part of each switch
- Reassemble the switches
- Put the switches and keycaps back in place, and voila!
For more detailed instructions, click here to read our full guide to lubing switches.
What are switch films and what do they do?
Switch films are tiny plastic rectangles that you can insert between the top and bottom housings of your switches!
These films can reduce wobble and rattle–and lead to a MUCH improved sound and feel.
Here’s the basic process:
- FIRST, check to see if your switches actually NEED films (most don’t! See the video above to see how to check for wobble
- Pick up a pack of films
- Remove your switches and take them apart (most people film their switches DURING the lube process while they’re already taken apart!
- Place the switch films on the bottom housing (positioned correctly, see video above)
- Assemble the rest of the switch and pop the switch back together (make sure it goes all the way back together!)
For wobbly switch housing, switch films make a HUGE difference.
Here’s our full guide to filming keyboard switches.
Mod Your Stabilizers
| Difficulty: | Medium |
| Cost: | $12 for lube, maybe a package of bandaids |
| What you need: | Lube, optionally bandaids, a good pair of clippers |
Ever felt keyboards with jiggly keys? Or a key that always seems to get stuck? And it probably makes that annoying ‘clacky’ sound too. Chances are the keyboard has bad-quality stabilizers.
For the newbie keyboard nerds, it’s the little component between the switch and the keycap to keep it steady.
So, how can you tweak your stabilizers for a better typing experience? You will need to follow a 3-step method (mentioned below), and it’s also essential that you watch a video tutorial before attempting to mod the stabs.
1. Clip Your Stabilizers
Firstly, you’ve got to remove the keycaps and switches and disassemble the stabilizers.
Next, you’ll need a pair of scissors to cut the excess sections off the stabilizer inserts so that they are flat and even. This will make your stabilizer more… well, stable.
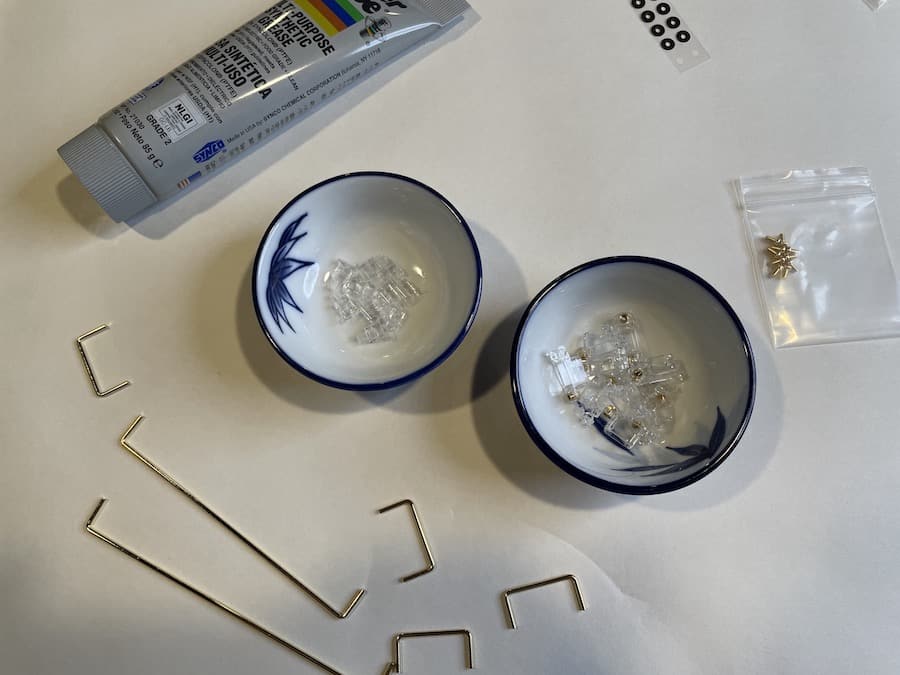
2. Lube and Tune Your Stabilizers
On to the most important part!
You need to lube the entire surface of the stabilizer housing component as well as the stabilizer bar.
This really works to remove unwanted friction that often causes keys to get stuck. It will also make your mechanical keyboard a whole lot quieter.
3. Band-Aid Mod
Finally, you can drastically dampen the sound of the stabilizers coming into contact with the PBC with the help of a few Band-Aids.
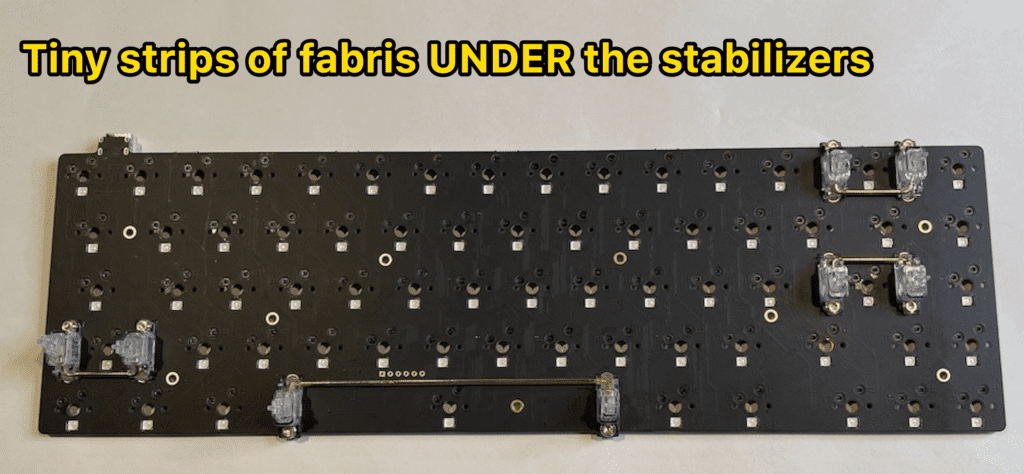
Cut the sticky parts of the Band-Aid into small strips and use tweezers to stick them on the PBC in the areas where the stabilizers are located. (Tweezers really help).
Reassemble the stabilizers, switches, and keycaps, and BOOM – you have yourself an instant upgrade in the sound quality and feel of your keyboard!
Install O-Rings
| Difficulty: | Easy |
| Cost: | Less than $10 |
| What you need: | Just some O-rings |
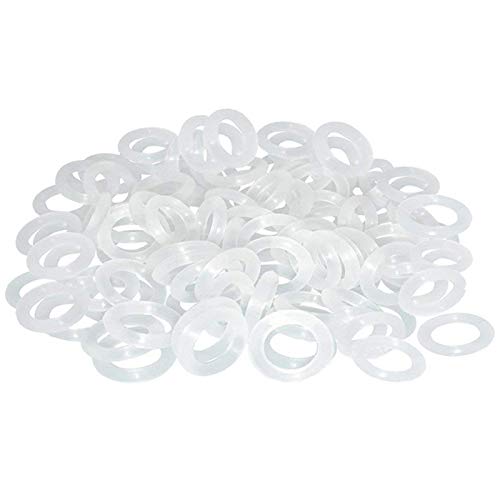
- Softer for better shock absorption. minimizes finger fatigue.
- Reduces sound produced by the key Shock absorption. Can effectively prevent the air leak, have good sealing effect.
- Suitable for Cherry and other Mechanical keyboards.
Cheap, effective, and super easy to install? Count me in!
Adding some rubber O-rings is another simple modification to improve the sound quality of a mechanical keyboard.
It’ll dampen and soften each keypress.
(some people don’t want that! If you like loud keyboards, don’t do this)
And if you know how to replace the keycaps, you pretty much already know how to install O-rings. All you need to do is slip the rings underneath your keycaps to act as a buffer, and you’re good to go!
Click here to read our full guide to installing keyboard O-rings.
Upgrade to a Custom Cable
| Difficulty: | Easy |
| Cost: | $20-65 |
| What you need: | Just a custom cable in a color you like |
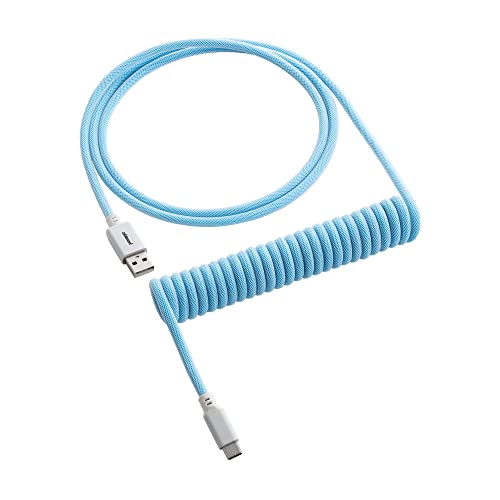
- Made for Keyboards with a USB-C Port
- Dual Sleeved with ModFlex and ModMesh Sleeving
- Made with CableMod ProCoil Cable Coiling
No, this won’t actually change the sound and feel of your keyboard, but they DO look amazing and will make you happier sitting at your desk 😉
First, you’ll need to make sure that your keyboard has a detachable cable. Not all of them do!
(I suppose you could take apart your keyboard case, do some wire splicing, but who knows how to do that??)
The perks of a custom cable? It can look really SNAZZY. You can find really good-looking colorful cables that are either straight or coiled – whatever fits your aesthetic! Who’d have thought connecting a cable to a USB port could be so exciting?
Install Sound-Dampening Foam
| Difficulty: | Medium hard |
| Cost: | $15-20 |
| What you need: | Foam of your choice, exacto knife or similar, screwdriver |
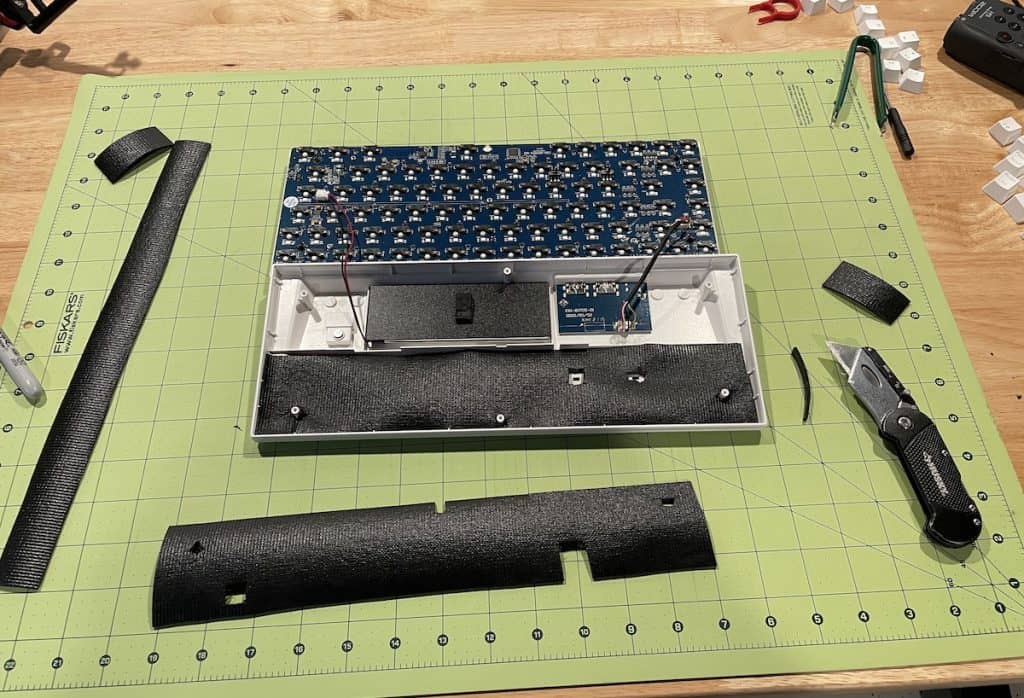
Are you ready to up your keyboard modding game BIG time?
Then you don’t want to sleep on sound-dampening foam! You’re in for an even smoother (or, as some would say, luxurious) typing experience.
Installing foam underneath your keyboard’s keycaps can dampen the noise, reduce vibrations, and improve the overall feel while you type.
What type of foam is used for modding keyboards?
Anything from…
- packing foam
- neoprene (what I recommend)
- lining foam
- Sorbothane (great but more expensive)
You can even use bubble wrap, drawer liner, and even putty. Basically, whatever you (and your wallet) can get your hands on.
Want to know the best way to install foam into your keyboard? Click here!
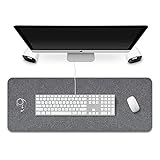
Grab a Desk Mat
| Difficulty: | Super easy |
| Cost: | $20-40 |
| What you need: | Desk mat of your choice! Pleather or wool |
Want to know the absolute easiest way to improve the sound of your keyboard? Trust me; it’s foolproof.
Using a desk mat is highly effective at reducing noise and improving the acoustics of a mechanical keyboard.
How? A mat simply stops your keyboard from vibrating as much. (And vibrations = sounds.)
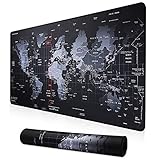

It’s really worth the small investment, and I guarantee you won’t have any trouble finding a cool design that suits your taste.
Or, you can even customize it completely. Want a desk mat with your dog’s face on it? Done!
Keyboard Modding FAQ
How Do I Mod Switches On My Keyboard?
Most cheaper keyboards typically come with bad-quality Cherry MX knock-offs.
So, how do you upgrade to switches that feel like heaven when you type?
You can either:
- Lube them: To reduce friction and scratchiness (more info on this above, scroll up!)
- Film them: Place a thin piece of plastic between the top and bottom housing of your switch. Check out this step-by-step tutorial to see how easy it is!
- Replace them with higher-end new ones: You have so many options to choose from! Whether you want a quieter and smoother experience or you enjoy the louder click-click keys with noticeable bumps when you press them – you can mod to your heart’s content!
Caution: If your keyboard happens to have switches that are soldered onto the circuit board, ABORT MISSION. (Unless you know exactly what you’re doing, of course). These kinds of mechanical keyboards require special care – one wrong move, and that’s it, RIP keyboard.
What Does a Modded Keyboard Mean?
It’s simply a keyboard that has been through modifications to improve the way it looks, sounds, or feels.
Many people enjoy modding mechanical keyboards as a pastime, or they just want to gradually upgrade a basic keyboard they bought on a budget.
How Can I Make My Keyboard Sound Better For Free?
If you have some mechanical grease or lube, scissors, and Band-Aids lying around the house, you can easily mod your stabilizers or lube your switches without spending a single cent.
Got a desk mat sitting in a drawer full of other bits and bobs you’ve long forgotten about? Dust it off and use it! You’ll notice the sound of your keyboard improve instantly.
How Do I Make My Keyboard Thock?
First, let me define thock for the newcomers. Thock is the word used to describe the dream sound of the most perfect keystrokes (in other words, a deep, low-pitched, extremely satisfying typing noise).
How do you make your keyboard thock? Keyboard mods!
Start off by trying one of the easy mods mentioned in this guide, for example, swapping out your keycaps or switches, lubing the components, using a desk mat, installing O-rings or sound dampening foam, or improving the stabilizers.
Conclusion
We’ve taken a look at some of the easiest, most basic mechanical keyboard mods, and they’re great as a starting point for fledgling keyboard enthusiasts. But to be completely honest with you – the sky is the limit!
Whether you want to dive straight into the more complicated, time-intensive mods, or just stick to the bare minimum, there is something for everyone!
Most importantly, have fun while you’re at it!
RELATED: How to spray paint your keyboard!