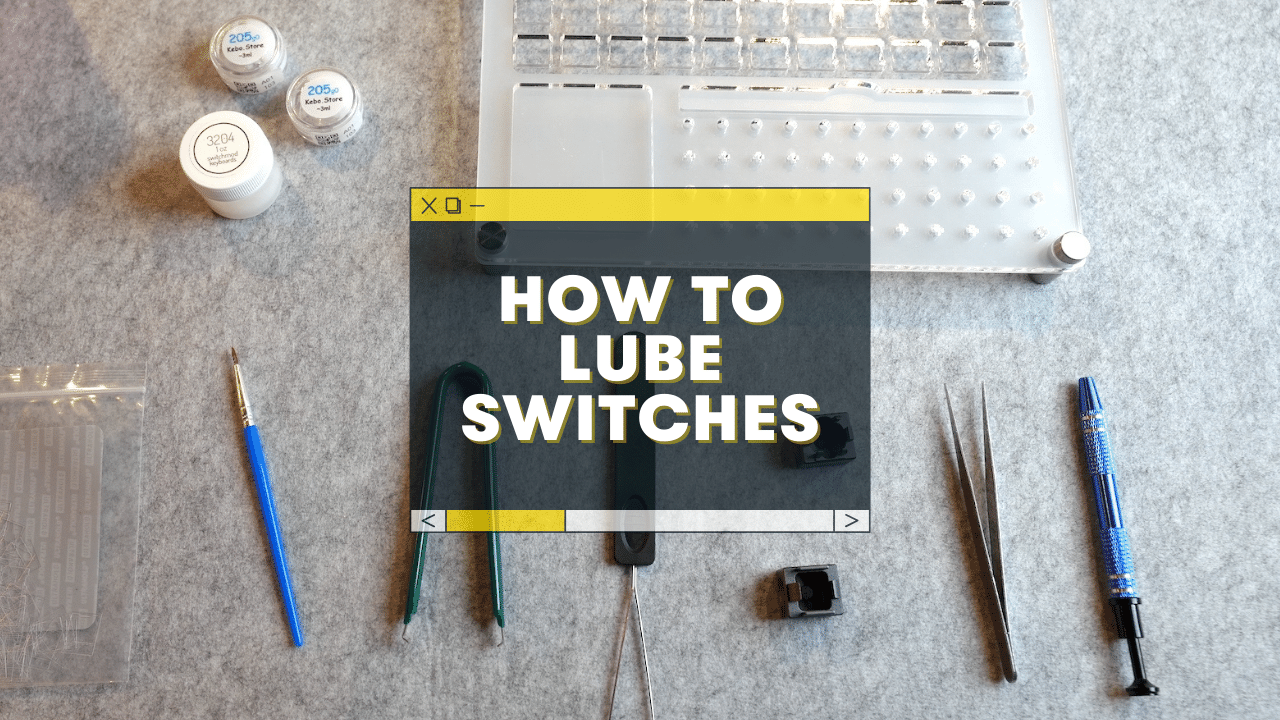
If you want your keyboard sounding and feeling it’s best, here’s how to lube keyboard switches:
- Remove your keycaps
- Remove your switches and take them apart
- Lube each component of the switch, from the bottom to the top
- Re-assemble your switch
- Put your switches back in and put the keycaps back on!
I’ve personally lubed over 1,000 switches, and while the process can seem a bit daunting at first, you’ll find it’s simpler (and more fun) than you think!
We’ll dive deeper into the lubing process, and share my favorite tips & tricks to make lubing your switches easy and fast.
Why Should You Lube Your Switches?
Honestly, it DOES make a big difference (depending on the switch)!
- Improved SOUND (usually less scratchiness and rattling)
- Improved FEEL (typing and gaming can feel smoother)
And frankly, the process of lubing switches is oddly satisfying!
Yes, lubing can be time-consuming, but you can also do it while watching a movie, relaxing, etc.
Is Lubing Your Keyboard Switches Absolutely Necessary?
No, it’s not necessary. Most beginners might not even be able to tell a difference between lubed switches and unload switches—at least at first.
But once you do try a fully lubed keyboard, you’ll likely never go back. The improved sound and feel really makes a big difference in the long run.
But strictly speaking, no, it’s not required at all!
Do ALL Mechanical Switches Need Lubing?
No. In fact, there are a few different switch types where lubing is actually a bad thing.
Here’s a simplified breakdown:
| Switch Type | Common switch colors | Should you lube them? |
|---|---|---|
| Linear Switches | Red, Yellow, Black | Will always benefit from lube! |
| Tactile Switches | Brown, Clear | Will mostly benefit from lubing, but too much (or too thick) lube can actually take AWAY tactility (the bump you feel when you press tactile switches). |
| Clicky Switches | Blue, Green | Generally speaking, DO NOT LUBE clicky switches at all. Lubing can take away the click and tactility (though some people do apply LIGHT lube to clicky switches, and only on specific parts of the switch) |
Also, the table above is for standard MX-style switches (Cherry, Gateron, etc. If you’re using Kailh Box switches, you probably won’t want to lube those either (mostly due to the “box” compartment within the bottom housing of the switch. You can still lube certain parts for sure!)
Tools Need for Lubing Switches:
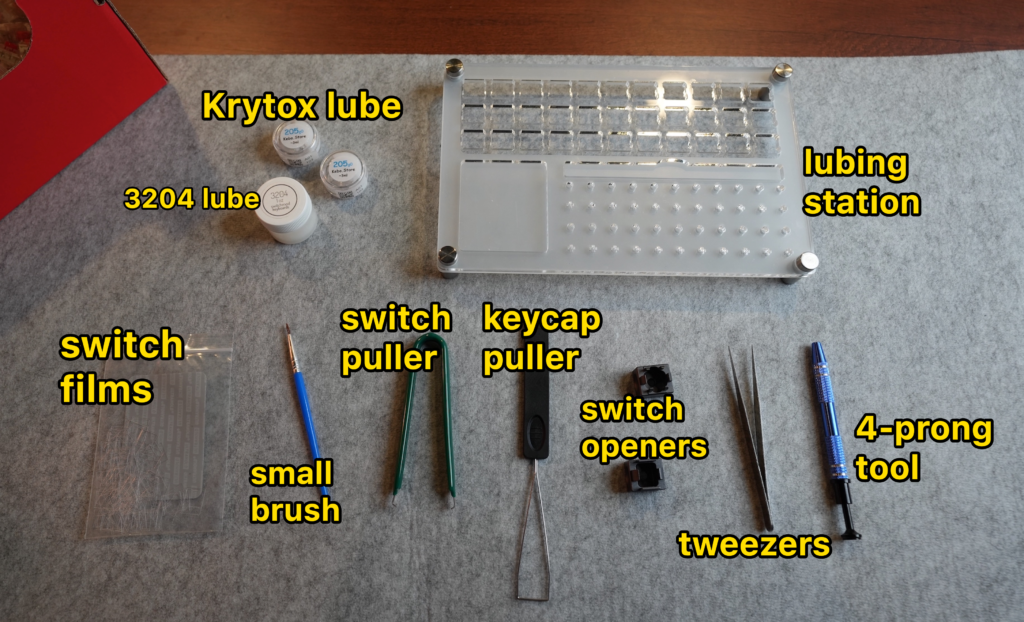
Here’s the equipment required (and optional “nice-to-haves”) for lubing:
| What you’ll need | What is does | Where to purchase |
|---|---|---|
| Lube | there are a ton of options depending on your switches, see below! | see below! |
| Small paintbrush | literally a small kid’s paintbrush | Steal your kids watercolor set, or grab a cheap set on Amazon |
| Switch Opener | to open each switch, allowing you to access the inside | Switch opener for MX-style switches (Cherry, Gateron, etc) Here’s a Kailh-style opener |
| Switch puller | to remove each switch from the keyboard | The ones I use from Amazon! |
| Keycap puller | to remove the KEYCAPS from the keyboard | You probably have one that came with your keycaps, but here’s a cheap one. |
| 4-prong “jeweler’s tool” or tweezers | To better grab the small parts of your switch! These are invaluable. | Grab these! |
| OPTIONAL: A lubing station | A small tray made specifically for organizing the switch lubing process (gives you a place to set the switches) | Here’s the one I have. It’s great. |
| OPTIONAL: A small Ziploc bag | For bulk-lubing your springs (see details below) | Normal plastic baggies available anywhere |
What can you use to lube keyboard switches?
It’s important to stick to a specific type of lube for your switches! Choosing the wrong lube could ruin your switches, ruin your keyboard, make a massive mess, get sticky or dry over time, etc.
You will want a lower viscosity (i.e. thinner) lube for tactile switches (so you won’t ruin the tactile bump).
You can use a higher viscosity (i.e. thicker) lube for linear switches.
| Lube | Viscosity (thickness) | Switch type and use? | Where to buy? |
|---|---|---|---|
| Krytox GPL 205 | Medium to thick | A good “general” lube! Linears & tactiles | Kebo.store or Amazon |
| Krytox GPL 105 | thinner | Good for tactile switches maybe, but also springs! Put 20ish drops in a baggy for bulk-lubing | Kebo.store, though there are knockoffs on Amazon |
| TriboSyS 3203 | thinner | really close to Krytox 105, maybe cheaper | Divinikey |
| TriboSyS 3204 | medium | Good general lube. Linear or tactiles | Divinikey |
- Thinner: Krytox GPL 105 is the #1 choice, with TriboSys 3203 being another option.
- Thicker: Krytox GPL 205, or TriboSys 3204
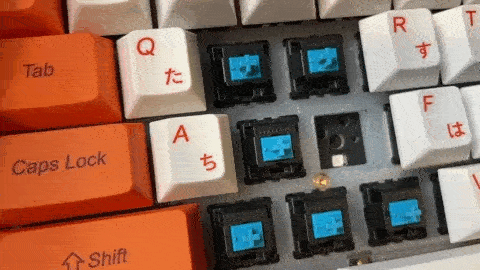
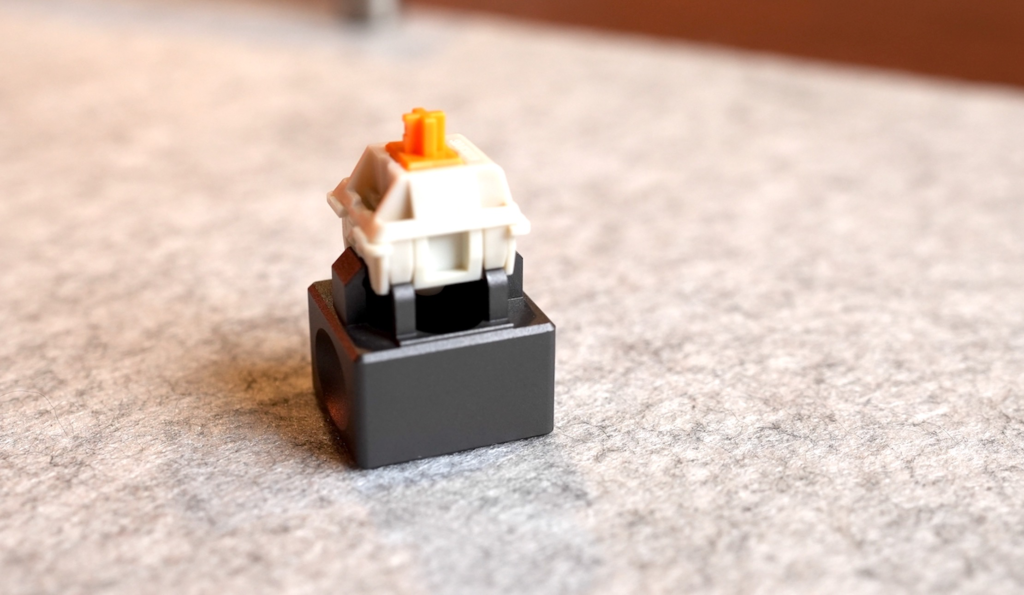
The Anatomy of a Mechanical Switch

Before we dive into the lubing process, here is a broad overview of MX-style switches:
- Stem: The colored part that connects to the keycap up top.
- Upper housing: The top “half” of the switch housing.
- Spring: This sits on the bottom housing, and the stem is placed on top.
- Copper “Contact Leaves”: A tiny copper plate that sits in the bottom housing (and pushes below the switch into your keyboard PCB), that actually actuates a keystroke when you press down.
- Bottom Housing: The lower half of the switch case.
How to Lube Your Mechanical Switches, Step by Step:
You’ll likely need an hour or two for this process, depending on how many switches you’re lubing.
1 – Remove the keycaps
Using a keycap puller, carefully pry the keycaps off of your switches (they’re simply sitting on top of the stems).
If you have the space, try to keep the keycaps organized (in order). That will make them easier and faster to put back on.
2 – Pull out the switches
If your keyboard is hot-swappable, meaning the switches are not soldered to the PCB, you can simply use your switch puller to remove the switches.
(You’ll compress the 2 “tabs” on either side of the switch, then pull directly out).
However, if your keyboard switches are soldered in—you’ll have to desolder them first (which involved taking apart your keyboard even further).
See this guide for a full tutorial: How to Change Mechanical Keyboard Switches (Fast and Easy)
3 – Take apart the switch
If your switches are out, it’s time to grab your switch opener!
- Press the switch down (gently) on the switch opener, until you hear and feel it detach
- Familiarize yourself with how each part of the switch is oriented (you can always look up pictures online later though)
- Separate each part of the switch (we recommend keeping each component organized in a separate cup, bowl, etc!)
- Repeat for each switch
This is where a switch lubing station might come in handy. They have dedicated spaces for setting and organizing the switch components.
But it’s still optional.
4 – Load your paintbrush with some lube (IMPORTANT)
When it comes to lubing mechanical switches, remember that less is more.
There is a right way and a wrong way to get lube on your brush—you probably do NOT want to see big white clumps of lube.
Instead, wipe off excess lube until you have a nice, clear sheen.
I prefer to get a big clump of lube from the bottle and transfer it to the cap of the lube bottle (which is flat and open, which allows me to swirl around the brush to get a proper amount of lube).
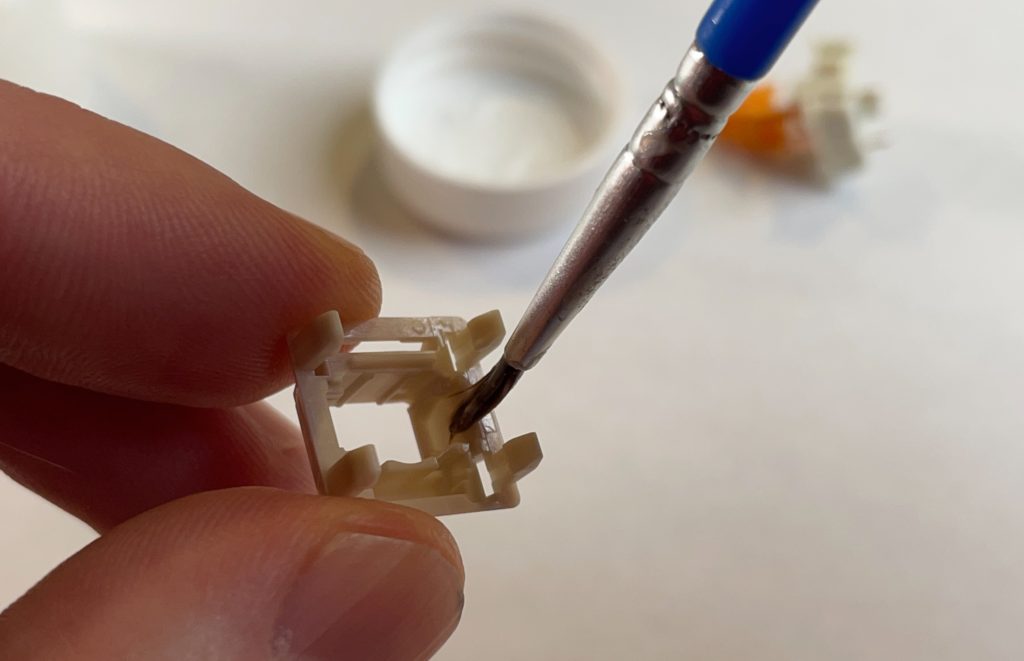
5 – Lube the lower housing
First up is the bottom housing of the switch.
(This might go without saying, but note that we only lube the inside parts of a switch. Every lubing spot I refer to is INSIDE the switch)
Start with the two “rails” on either side. These are where the stem slides up and down.
- Apply a small amount of lube to one side, then some to the other side.
- Lightly spread around the lube in small strokes
- There should NOT be clumps of white lube, it should be a small, clear sheen
Next, lube around the hollow shaft in the center of the switch (this is where the spring sits).
TACTILE SWITCHES: Be very careful NOT to lube the copper leaves! This will reduce tactility!
Last, spread around a tiny bit of lube (just move your brush in a circular motion) around the inside of the switch. You’ll end up getting a bit on the copper “leaves,” probably on the little parts that stick out (called actuation points).
Again, less is more!
Underlubing is actually preferable to overlubing. You don’t want that sticky, scratchy feeling.
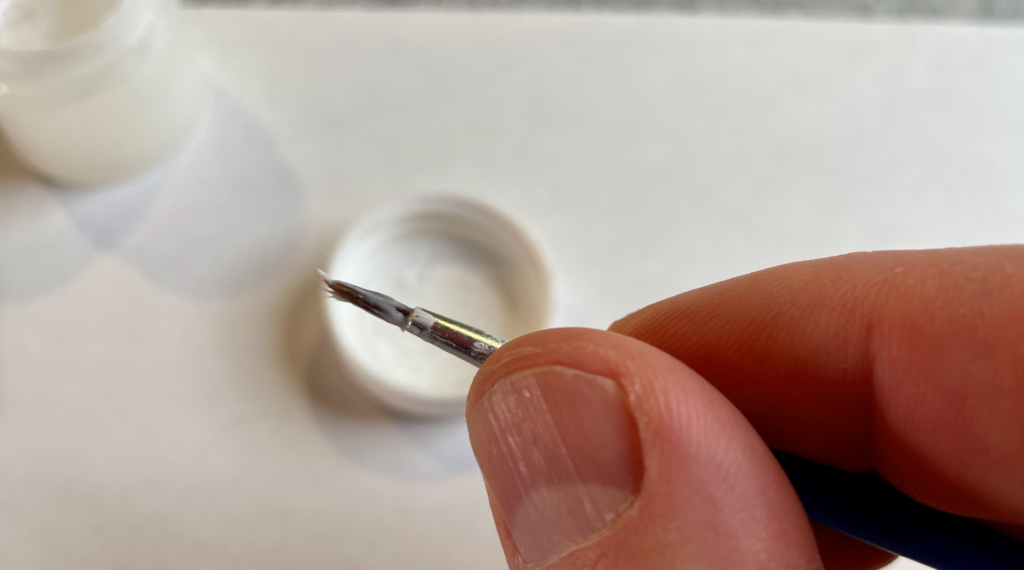
6 – Lube the spring
You have 2 options for lubing springs:
- Lube each individual spring (if you’re only doing a few switches, this is fine)
- Bulk-lube all the springs at once in a plastic bag (if you’re doing a ton of switches, this will be faster).
Here’s the process for lubing an individual spring:
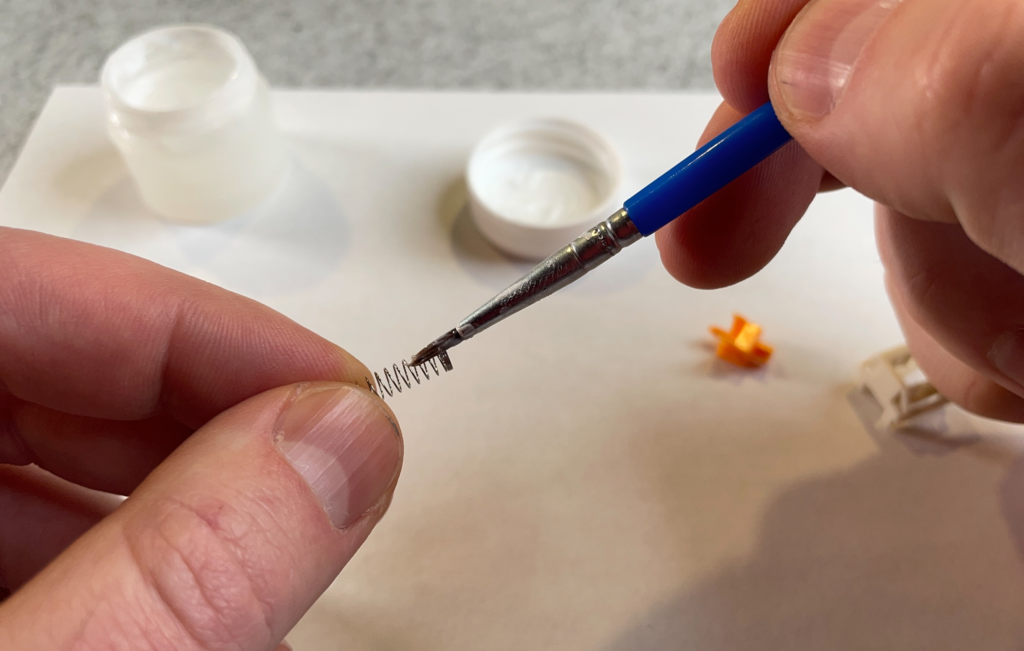
- Hold one end of the spring (tweezers might be easier)
- Brush some lube in a circular motion around the other end you’re not holding. First on the outside of the spring, then on the inside.
- Place the LUBED side of the spring into the bottom housing (onto the hollow shaft in the center)
- Lube the other half of the spring in a similar fashion!

I won’t say you can be sloppy with lubing spring, but if there are some parts with “white” lube (as supposed to clear), you’re probably ok.
How to bag-lube switch springs:
- Grab a small plastic sandwich bag (Ziploc)
- Put some lube in it (preferably an oil-based lube like Krytox 105, etc. I’d recommend starting off with a smaller amount of lube, and adding more as you deem it necessary).
- Add the springs
- Close the bag with some air left in it and shake the springs for a good 30-60 seconds
- Open the bag (to let out the air), then rub the springs around a bit with your fingers
- If the springs get stuck to each other, use a pair of tweezers (I use TWO pair of tweezers) to gently pull them apart. This can get finicky.
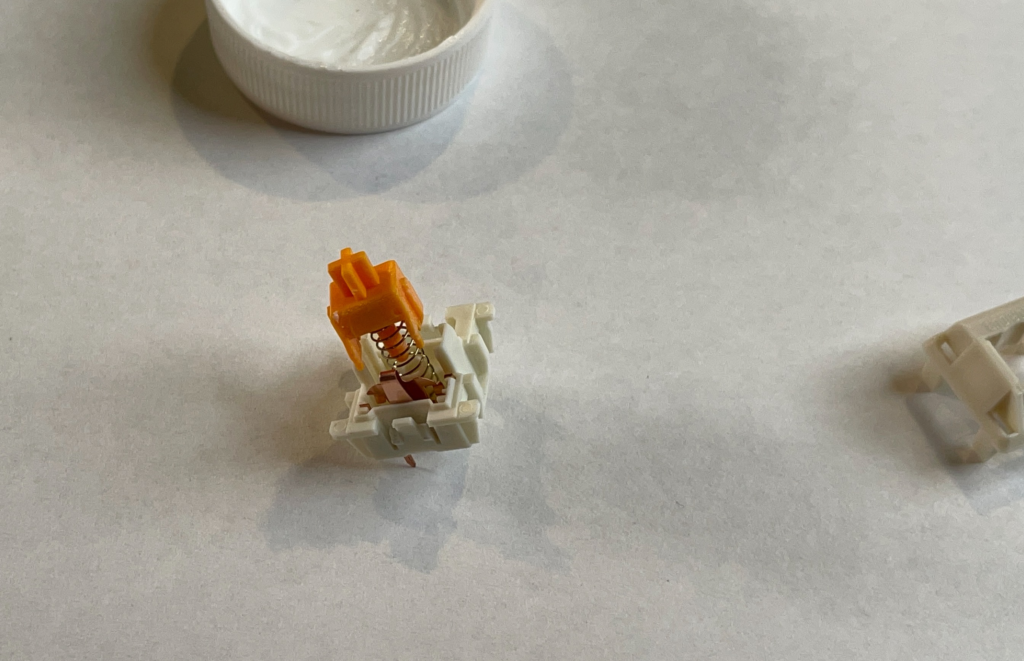
7 – Lube the stem
I recommend using a 4-prong jeweler’s tool to pick up the stem (grab it with the top part of the stem that goes into the keycaps).
Here’s how to lube the switch stem:
- Load your brush with a bit of lube
- Apply a dab of lube on each of the 4 sides of the stem (the OUTSIDE of the stem).
- Go back to each side individually and brush the lube in with light, consistent strokes
- After you have a clear sheen, apply some lube to the inside of the stem. Move your brush in a circular motion around the shaft
It’s worth noting that the sides of the stem are the most important to lube, as those parts experience friction against the “rails” of the housing.
TACTILE SWITCHES: Do NOT lube the legs of the stem! This is the part of the switch that gives tactile switches the bump, you shouldn’t lube these.
You can also be sure to apply just a TINY bit of lube to the bottom edge of the stem (which will hit the bottom of the switch).
Using your 4-prong tool, drop the stem into the spring (make sure to position it correctly! The “actuation points” on the stem should line up with the copper leaf actuation points).
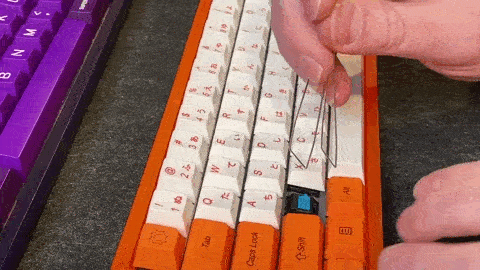
What about switch films?
Switch films are thin pieces of plastic that you can lay inside your switch at this point in the lubing process, and they’re designed to reduce the “wobble” and “rattle” of your switch!
Some switches are tight enough already and don’t need films. For other switches that have wobble, films can make a huge difference in sound! See my video below for instructions on switch films.
8 – Lube the upper housing
I’m going to be honest with you—I sometimes skip lubing the upper housing! Yes, it can make a difference, but I’ve personally found it to be the least necessary step in this process (others would totally slam me for this, but whatever).
- Load your brush with lube
- Apply a dab to the two “rails” on either side of the switch (the part that the steam slides in)
- Go back and smooth out the dabs until you have a clear sheen
- That’s pretty much it
I personally don’t do much more with the top housing!
9 – Carefully snap the switch back together
Place the top housing (positioned correctly) onto the lubed stem, and press down until you hear and feel it click.
“Test” the switch with your fingers, pressing down the stem a few times to make sure everything is SMOOTH (you’ll know if you positioned something incorrectly, the stem probably won’t even go down).
10 – Re-install your switches on your keyboard!
If you have a hot-swappable keyboard, you can simply press your switches back in (again, make sure they’re positioned correctly by looking at the pins on the underside of the switch).
If you need to solder your switches in, well, get to it!
11 – Test all your switches BEFORE you put your keycaps on!
Plug in your keyboard and open up a testing tool like https://en.key-test.ru/.
Go through and press each switch, making sure everything’s in working order! It’s better to diagnose problems now, before you put your keycaps back on.

Install keycaps again, and you’re done!
Enjoy your freshly lubed keyboard switches! 🙂
Can you lube switches WITHOUT desoldering?
Yes, you can technically lube switches without desoldering them first, but only to a certain degree! You won’t be able to fully lube every component of the switch that experiences friction, but even a slightly-lubed switch is better than nothing (as long as you do it correctly).
There are a few different methods, but most include pressing down the stem of your switch, and inserting a tiny bit of lube down into the switch.
To lube switches without desoldering, you’ll need to find (or create) a small piece of plastic that will fit down into your switch (around the stem).
- Remove your keycaps
- Apply lube to a tiny piece of flat plastic (just a small dab on the end)
- Press down the stem with your finger (or tweezers)
- Slide the plastic down into the switch on each of the four sides of the stem
- Wipe up any excess lube that made it’s way outside of the switch
There are also methods involving spraying lube down into your switches, but I’ve personally never tried this method (as it’s messier).
What is the FASTEST way to lubricate a keyboard switch?
If you’ve lubed switches before, you already know just how much time this can consume. Luckily, there are a few tips & tricks to speed up the process.
- Bulk-lube your springs in a plastic bag
- Skip lubing the top housing of the switch (or only apply lube to the side rails that the stem slides in)
- Purchase a switch lubing station. Aside from helping you stay organized, this will allow you to quickly move from switch to switch without picking them up.
- You can also experiment with spray lubing switches. This won’t be nearly as effective as opening switches to lube manually, and it’ll be messy, but it is much faster!
How do you lube a keyboard switch?
Here’s the overall process of lubing a mechanical keyboard switch:
- Remove the keycaps from your keyboard
- Use a switch puller to remove the switches from a hot-swappable keyboard (for a soldered keyboard, you’ll need to take your keyboard apart and desolder the switches)
- Use a switch opener to take apart the switch
- Lube the inside of the bottom housing, applying a THIN coat of lube (until it’s clear and shiny)
- Lube one-half of the spring, then insert that end into the bottom housing
- Lube the other half of the spring
- Lube the stem on all 4 sides, and then on the inside around the shaft
- Place the stem onto the spring (positioned correctly)
- Lube the inside of the top housing, then place it on the stem (positioned correctly)
- Gently snap the switch back together.
Summary: Lubing switches is fun and rewarding!
Even though it takes a bit of time, lubing your switches can make a HUGE impact on the way your keyboard looks and feels!
And like anything, practice makes perfect. Try to enjoy the process, and enjoy your clacky new keyboard!
Want to build a custom mechanical keyboard from scratch? Check out our guide here: How to Build a Custom Keyboard: An Easy DIY Mechanical Keyboard Guide.