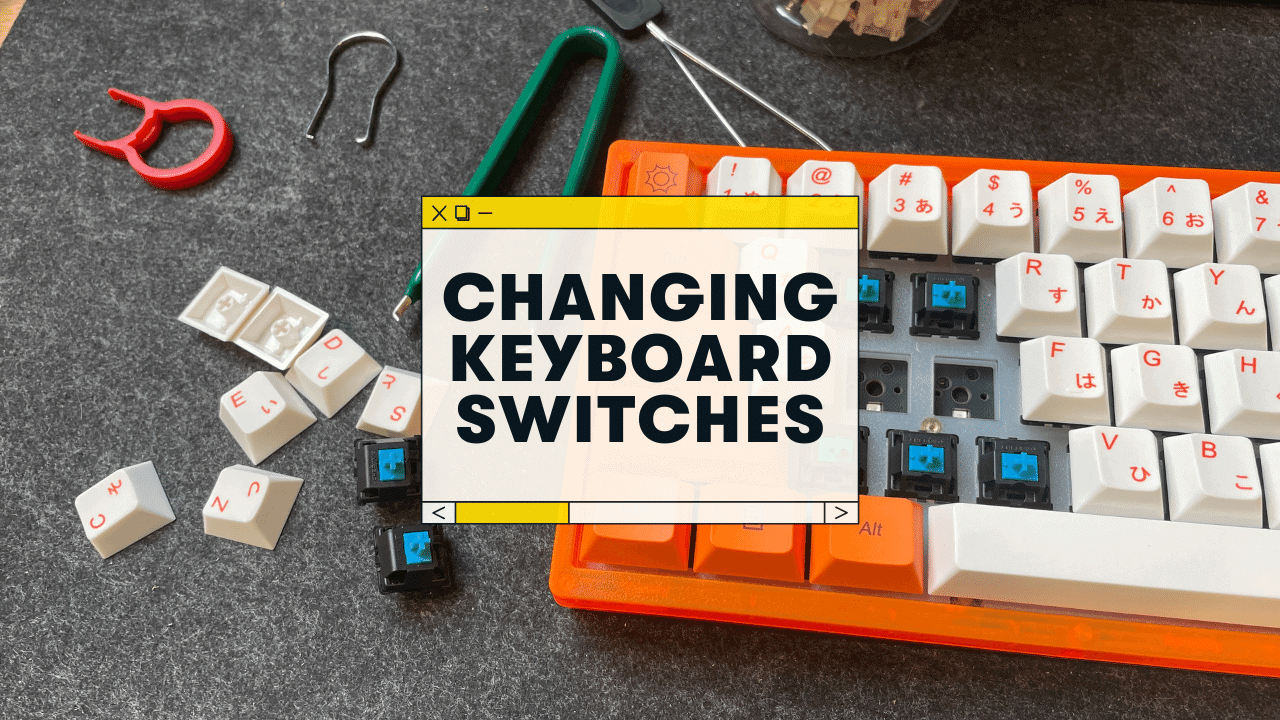
Here’s a breakdown of how to change mechanical keyboard switches:
- Remove the keycaps with a keycap puller.
- [Hot-swappable keyboards] Use a switch puller to gently remove the switches from the PCB or plate.
- [Non-hot-swappable keyboards] Disassemble your keyboard, and desolder each switch using a soldering iron and solder pump. Then, remove the switches from the PCB.
- Insert your new switches (and solder them if using a non-hot-swappable keyboard).
- Test each switch to make sure it was installed correctly.
Below, we’ll break down each step in the process, as well as give some proven tips that’ll help this process go smoother and faster (and dare we say, more fun??).
WHY Should You Change Your Mechanical Keyboard Switches?
There are a few reasons why you might want to change your switches out…
- For whatever reason, some switches might STOP working (And you want to replace them)
- You might want to change how your keyboard SOUNDS. There are a variety of different switches out there, which can drastically change how loud or soft your typing experience is.
- Similarly, different switches can mean different FEELS.
- Last, changing switches can actually be FUN, rewarding, and relaxing! It is a hobby, after all 😉
You should check out our full guide to mechanical switches here, but here’s a very brief breakdown of switch types:
| Switch Type | Notes | Common Colors: |
|---|---|---|
| Linear Switches | These are the most straightforward. They go down and back up. | Red, yellow |
| Tactile Switches | Unlike linear switches, these switches give you a tiny “bump” when you press the key–giving you a “tactile” feedback that you’ve pressed the key! | Brown, clear |
| Clicky Switches | These operate the same way as tactile switches, but with a more distinct “click” when the key is activated. | Blue, green |
So if you’d like to experiment with new switches for whatever reason, let’s dive into the process of changing them.
Pro Tip: This process is different depending on whether you have a “hot-swappable” keyboard!
A hot-swappable keyboard is one where you can literally push in (and pull out) mechanical switches from your PCB—WITHOUT soldering.
It’s incredibly easy and fast to change switches on hot-swappable keyboards.
On the other hand, a NON-hot-swappable keyboard means you will need a soldering iron and accessories in order to both install switches, as well as remove them.
I’ve included instructions for both types of keyboards below 😉
Tools Needed for changing switches:
At a minimum, you’ll need…
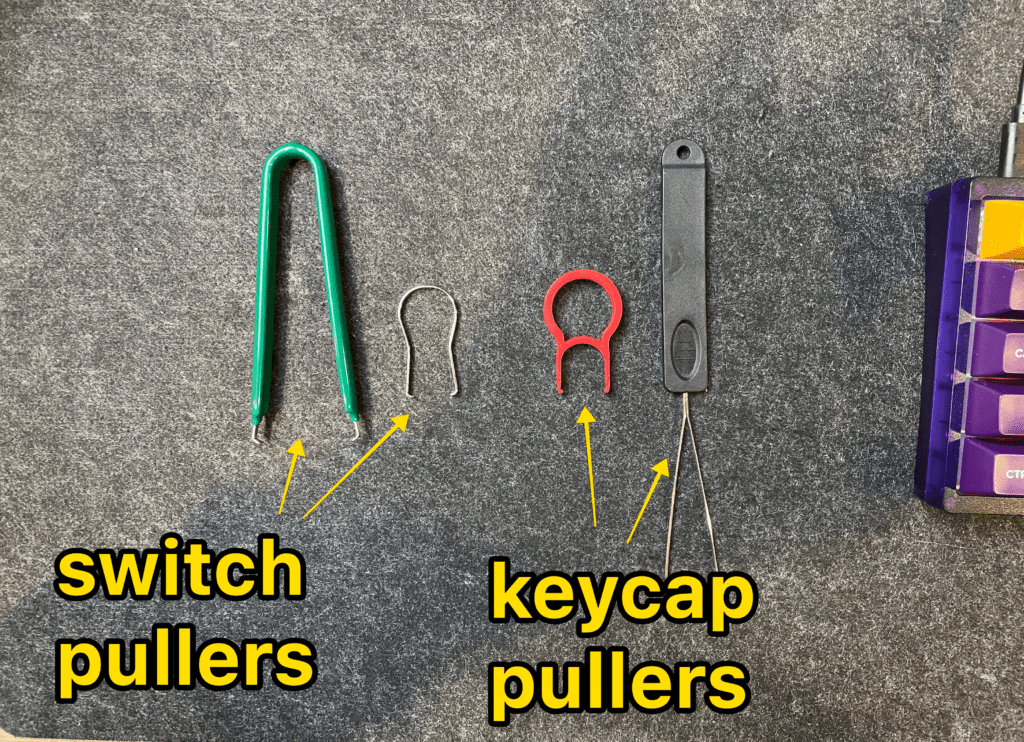
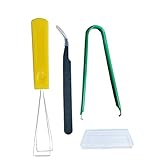
- A keycap puller (to remove keycaps)
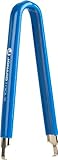
- A switch puller (to remove the switches)
That’s with a normal hot-swappable keyboard.
If your keyboard is NOT hot-swappable (meaning your switches are soldered in), you’ll also need…
- A soldering iron
- A “solder sucker,” i.e. solder pump
- Various other soldering accessories (almost ALL of this usually comes with a soldering iron kit!)
Many mechanical keyboards will actually come WITH a keycap puller and switch puller, but I’ve always found those difficult to work with.
If you plan on changing switches in the future, you might consider grabbing some cheap puller off of Amazon. They’re inexpensive and are WAY easier to work with (than the pullers that came with your keyboard).
Here are the ones I recommend:
How to Change Mechanical Keyboard Switches (On a Hot-Swappable Keyboard)
Here are the basic steps:
- Remove the keycaps
- Remove the switches (carefully!)
- Press in new switches
- Test your new switches!
If you do NOT have a hot-swappable PCB, skip this section. The desoldering instructions are below!
Step 1 – Remove the keycaps (with your keycap puller)
Using your keycap puller, gently remove the keycaps from the switches.
Try to pull them straight up, and don’t go too fast! Depending on what material your puller is—you risk damaging or scratching the keycap!
Here are some bonus tips:
- Keep your key caps in the order that you took them off if you wanted to be slightly easier and faster putting them back on!
- If you pull a keycap off, and the switch comes out with it, that’s OK. Just gently pull the keycap off of the switch.
- If a key cap is being stubborn, you can gently wiggle it back-and-forth as you pull.
Step 2 – Remove the Switches (Using a Switch Puller)
If you have removed all of your key caps, it’s time to grab your switch puller.
IMPORTANT: There are little “tabs” on the sides of your switches you’ll be pressing in!
You aren’t grabbing the switch anywhere—you will be squeezing these tabs to allow the switch to pop out!
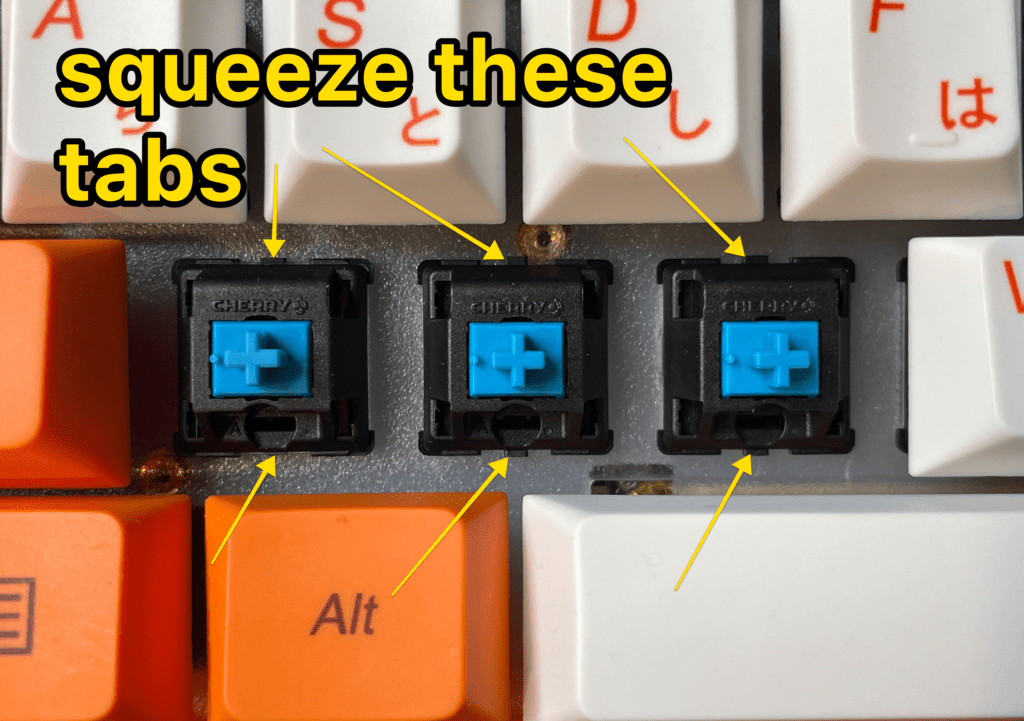
With your switch puller, GENTLY and CAREFULLY squeeze in these tabs as you pull out the entire switch.
Tips:
- Your metal switch puller can scratch your PCB/plate! Try not to do that 😉
- You can GENTLY wiggle the switch as you pull it out
- Practice makes perfect
The first time I removed switches, I had a really hard time, and ended up damaging several of the switches! (I broke the plastic tabs on a number of occasions, and also scratched up my plate pretty bad).
Just take it slow at first. The more switches you change, the better you get at this process.
How to Remove Switches Without Switch Puller Tool
Though I do not recommend it, it is possible to remove switches from your keyboard without a switch puller.
You can try…
- A flathead screwdriver (preferably a small & thin head!) If you have a precision screwdriver kit, these will probably work the best.
- 2 guitar picks! The thickest ones you can find.
- Binder clips?
- Patience
The important part is that you can gently press in the plastic tabs, allowing you to simply pull out the switch. You might have to do a tiny bit of prying at the corners of the switch as well.
Step 3 – Press in New Switches
Once your old switches are removed, it’s time to press and the new ones!
For hot-swappable keyboards, this process is incredibly easy.
- Make sure you’re aligning the switch correctly (by looking at the pins on the bottom of the switch and making sure those align with the holes on the PCB)
- OPTIONAL: If you notice bent pins on the switch, you can straighten them out with tweezers (or with your fingers). This is important! Your switch won’t go all the way in if your pins are bent.
- Gently press the switch in.
Voilá.
PRO TIP: There are different mounting styles, even amongst Cherry-style MX switches! Specifically, there are 3-pin switches and 5-pin switches.
5-pin switches (PCB-mounted) have 2 extra plastic “legs” to help it fit snugly into your PCB (without the plate).
3-pin switches only have 2 metal prongs and a center “knob.”
But you CAN convert 5-pin switches by removing the extra plastic “legs!”
You’ll take some cuticle clippers (or possible nail clippers) and clip off the 2 extra legs.
Step 4 – Test your switches to make sure they work correctly (before installing keycaps)
If you have installed your new switches, you will want to plug in your keyboard and test that you did everything correctly.
You can use a tool like https://en.key-test.ru/ to quickly make sure that all keys are registering properly (else you can also just open up a text document and start pressing things).
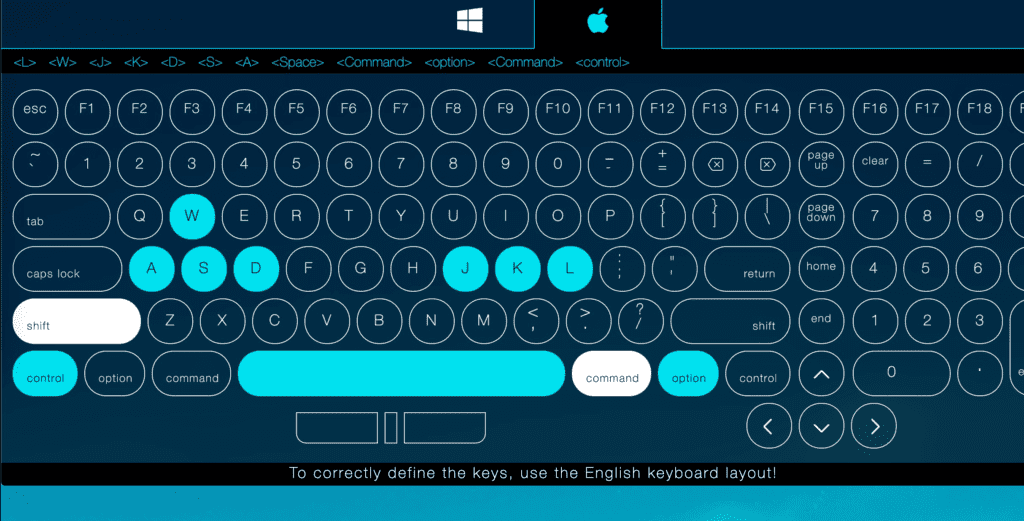
Every now and then you will realize that you bent a pin when you install the switch, etc, and you’ll need to remove that one switch and try again.
Step 5 – Press your keycaps on the switches!
Obviously, you want to make sure you are aligning your switches correctly, and that the keycaps are in the right spots, but other than that it’s simple to press the keycaps down onto the switch stem!
Annnnnd for a hot-swappable keyboard, you’re done!
The entire process can be done in the length of time it takes you to watch one episode of The Office 😉
How to Change Switches on a NON-Hot-Swappable Keyboard (With Desoldering)
Now let’s examine the process with a non-hot-swappable PCB.
- Remove the keycaps and disassemble the keyboard case (giving you access to the underneath of the PCB
- Assemble your soldering iron, accessories, and work environment.
- Heat up the solder joints for each switch with the soldering iron, and then use a solder sucker to remove the solder
- Remove the switch
Step 1 – Make sure you have the soldering tools you need
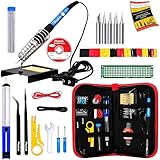
👆That is the soldering kit I ordered on Amazon. It came with everything needed for this process (and then some!)
At the very least, you’ll need
- A soldering iron
- A solder sucker (solder pump)
- Solder wire (assuming you put in new switches of course, you’ll solder them in)
- A well-ventilated area in which to work (preferably outside)
Step 2 – Remove the keycaps
See the hot-swappable instructions above, but you’ll use your keycap puller to gently remove the keycaps from the switches.
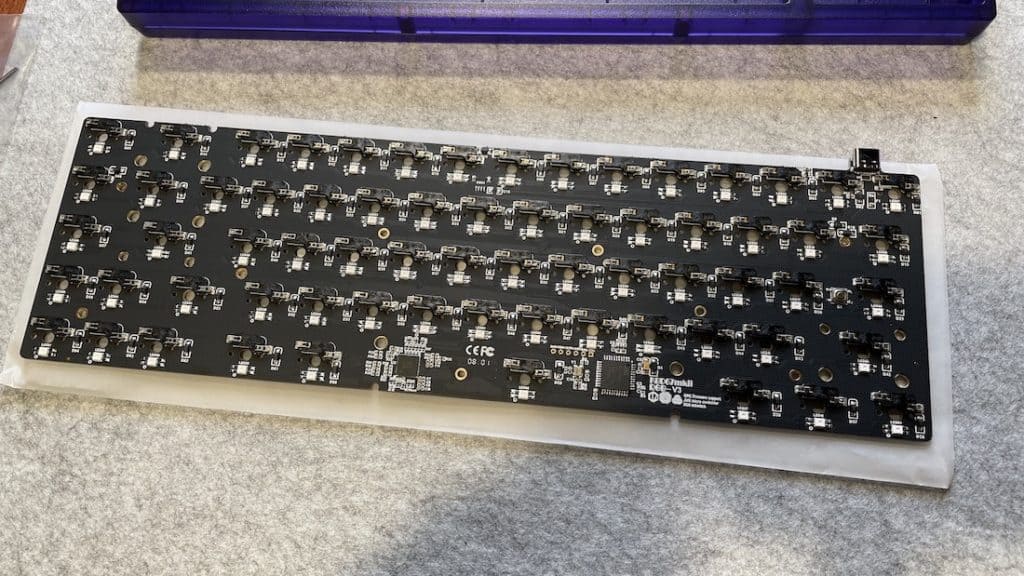
Step 3 – Disassemble Your Keyboard
You’ll need access to the BOTTOM of the PCB where your switches are installed.
This step will look different depending on your keyboard!
Using a screwdriver, take apart the keyboard case (and/or plate if you have one), keeping all the components in a safe space for reassembly later.
You’ll want to end up with just your PCB with the switches installed. If you’re having issues, check out your keyboard manufactures website for documentation or instructions!
You don’t want to break anything just because you’re unsure of how to disassemble your keyboard.
Pro Tip: Before soldering, it’s important to go ahead and set up your work environment. You’ll have to remove solder FAST after loosening it up, so have your solder sucker nearby. Also, WORK OUTSIDE. Lead fumes will be released in this process, and inhaling that is VERY bad news.
Step 4 – Press the Soldering Iron to the Joints and Suck Up the Solder
First, heat up your soldering iron.
Second, prepare your solder sucker (you’ll probably press the pump down).
Then, carefully press the hot iron to the solder joints, heating up the leaded solder and loosening it up (this will only take a second or two).
Last, position your solder sucker tip against the solder & soldering iron, and press the button to suck it up!
Repeat for each joint, and then for each switch.
Pro Tip: If you’re having a tough time removing solder, you might add MORE leaded solder and then try again.
Part of the reason it might be difficult to remove solder is because of the poor quality. Obviously, this depends on who made your keyboard.
You might find that by adding some solder of your own, it might be easier to remove the whole thing (because high-quality leaded solder will stay in LIQUID form longer, allowing it to be sucked up easier).
Step 5 – Remove the switches
If your switches are mounted into a plate, you will probably have to get out your switch puller and pull it out.
On the other hand, if your switches are mounted into the PCB, they will likely just fall out! (If not, try pulling just a tiny bit. If you can’t get em out right away, you didn’t desolder all the way).
If that happens, add a bit more solder of your own, then try sucking it out again.
Step 6 – Insert New Switches and Solder Them In!
If you have successfully removed all of your switches, it’s time to solder in new switches!
Insert your news switches into the PCB (or plate depending on your setup), and then start soldering 😉
FYI – if you’re new to soldering, You might watch a YouTube video or two to get it down 😉
FAQ & Tips: Replacing Mechanical Keyboard Switches:
Here are some common questions about the switch changing process:
Are All Switches Hot Swappable?
Almost all standard mechanical keyboard switches WILL fit into a hot-swappable keyboard. These include Cherry MX style switches, as well as Kailh, Outemu, Gateron, and others.
And while some PCBs only accept 3-pin switches, it is possible to modify 5-pin switches to fit into these keyboards as well.
How Long Do Mechanical Keyboard Switches Last?
Mechanical keyboard switches often last years (and even decades) depending on the switch type! For example, Cherry MX switches are built for up to 50 million keystrokes over their lifetime.
And while this number varies from switch to switch, it’s safe to say that mechanical keyboard switches will last several years at least, and definitely 3X to 4X longer than typical membrane keyboards.
How to remove Outemu & Kailh switches:
Outemu switches are MX-style switches that often come on budget mechanical keyboards, and they are typically removed in the same way as other MX-style switches (Cherry, Gateron, Kailh, etc).
Kailh is another brand of switches. Both Kailh and Otemu switches feature a slightly different upper housing on the switch, which means removing them (and opening the switches) requires a slightly different approach than MX-style switches.
- Remove the keycaps
- For a hot-swappable keyboard, use a switch puller to remove the switches by “squeezing” the small plastic tabs on either side of the switch.
- For a non-hot-swappable PCB, you’ll need to first disassemble your keyboard (giving you access to the bottom of the PCB), and then use a soldering iron & solder pump to desolder the switches.
- In order to open an Otemu switch, you’ll need a Kailh-style switch opener (which is slightly different than a Cherry MX-style switch opener). These are readily available on Amazon and other mechanical keyboard shops.
Conclusion: Changing switches is fun and easy (especially on hot-swappable keyboards)!
If you fancy changing the sound and feel of your mechanical keyboard, switches are a budget-friendly and easy way to do that!
Even if it takes a bit of time, the process can actually be quite fun and relaxing (and definitely worth it in the end!).
Here are some of my favorite switches, enjoy!
| Type | Switch | What I like |
|---|---|---|
| Linear | Cherry MX Reds | The classic, most popular switch ever? |
| Linear | Cherry MX Blacks | Slightly harder to press than reds, these are my FAVES |
| Linear | Gateron Milky Yellows | Another community favorite, these are extra smooth. Check out my YouTube review & sound test here! |
| Tactile | Glorious Pandas | Like the popular “Holy Pandas,” but cheaper and honestly just as good for my money 😉 |
| Tactile | Gateron Browns | Super, super cheap. These often come stock on pre-built keyboards, and I personally think they’re the best “stock” tactiles out there. |
| Clicky | Cherry Blue | These are classic clicky switches. |
| Clicky | Kailh Box Jades | These are thicker, “crunchier and metallic” sounding, and I LOVE THEM. I also reviewed the Kailh Box Jades on YouTube. |