In this step-by-step guide, we’ll teach you how to build a custom keyboard that looks, feels, and sounds like a million bucks.
I’ve built several keyboards (#NerdAlert), and I’m adding some little-known tips & tricks that’ll make this process easier and faster.
Warning: Building keyboards is fun and addictive. Even if all this seems overwhelming at first glance, it gets easier (and will be worth it)!
How to Build a Custom Mechanical Keyboard From Scratch: A Broad Overview
Here’s the entire building process in a nutshell:
- Choose what type of keyboard you want to build
- Purchase the different parts of your keyboard
- Unpack your components and test your PCB
- Install your stabilizers (and lube/mod them)
- Install your switches (lube/film them)
- Install sound-dampening foam
- Assemble the PCB & Plate into the Keyboard case
- Install your keycaps
- Test everything
- Program your RGB/lighting and keyboard
- Frequently Asked Questions
Let’s dive in!
PRO TIP: The building process is DIFFERENT for every keyboard!
This guide will be detailed and thorough, but you should know that building a custom mechanical keyboard is going to look different depending on the keyboard.
Pull up the detailed instructions on your particular keyboard’s website (most manufacturers will have these, and I open them every time I build a keyboard).
What Do You Need to Build a Custom Keyboard? (Our Equipment Checklist)
First, you should download our 100% free custom build checklist! You can print this out if you’d like, as it’s handy to keep nearby.
That said, here are the different tools & equipment you’ll need to build a keyboard:
Mandatory “must-have” equipment:
| Major things you NEED | |
|---|---|
| The components of your keyboards | We go over these in detail below! |
| Soldering Iron & Accessories | ONLY if you’re purchasing a non-hot-swappable PCB, explained below! |
| Small screwdriver | A tiny hobbyist screwdriver, available anywhere. |
| Switch Puller | To remove switches from hot-swappable boards. Many keyboards and switches COME with this, but they’re also available on Amazon. |
| Keycap Puller | To remove keycaps. These also come with many switches and keycaps, but on Amazon as well. |
Here are more tools that aren’t mandatory, but chances are high you’ll need these (depending on your build):
| You will likely need… | Link | |
|---|---|---|
| Switch Opener | Opens switches. Only needed if you’re lubing (or filming) switches. | Here’s a Cherry-style opener. Here’s a Kailh switch opener. |
| Switch Lube | For lubing switches. Krytox 205g is the most popular. | Kebo.store |
| Small paintbrush | A kid’s sized paintbrush, only if you’re going to lube switches. | Your local Wal-Mart or crafts store |
| 4-claw pickup tool | Only if you’ll lube switches–this is handy (get it?) for holding the tiny stem when lubing. | Amazon |
| Tweezers | You’ll use these to test your PCB (optional but helpful), as well as handle various small parts. | |
| Dielectric grease | Only if you’ll lube stabilizers. It’s like switch lube, but way thicker. We recommend dielectric grease (Superlube is a common brand). | Amazon or your local hardware store |
| Bandaids | Only for doing the bandaid stabilizer mod (see below) | Anywhere (but get the fabric kind) |
| Sound-dampening foam | Only for doing the optional foam mod (see below) | Sorbothane (expensive), or you can grab packing foam or drawer liner. Details below |
As you go throughout the sections below, try to figure out if you want to…
- Lube your switches
- Lube and clip your stabilizers
- Add sound-dampening foam
Most of the “non-mandatory” equipment listed above relates to those three activities!
1 – Choose What Type of Keyboard You Want to Build
First, you’ll need to do research and decide what type of keyboard you want to have!
If you don’t know anything about keyboards, you might want to read this post first: What is a mechanical keyboard? A simple guide)
Here are the top considerations when choosing what keyboard to build:
- Size & layout
- RGB and lighting
- Wired vs wireless
- Cost
Keyboard Sizes & Layout
How big of a keyboard do you want?
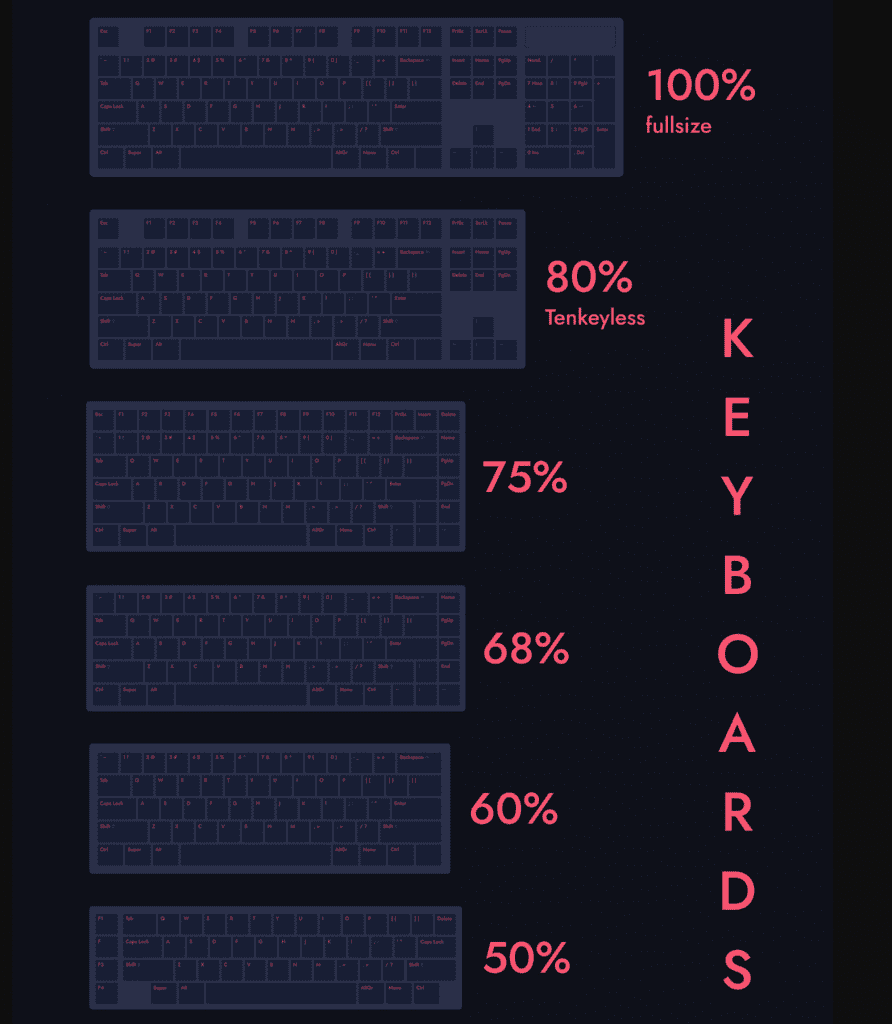
Here are the most common sizes:
- 100% Full-Sizes: This is the biggest type of keyboard, and includes the numpad on the right side of the board.
- 80% TKL (tenkeyless): On this size, they removed the 10-key numpad from the right side.
- 75%: This is about the same layout as the 80%, but with no dead space in between the keys! It’s compacted!
- 60%: These keyboards start to omit the arrow keys and the function row. This is one of the most popular sizes!
They make smaller keyboards (such as the 40%), but it will be more difficult to find components for these, and possibly more expensive.
Check out our full guide on keyboard sizes for more info.
Backlighting and RGB
Do you want your keyboard to put on a little light show every time you type?
Do your research to see what kind of backlighting you would like!
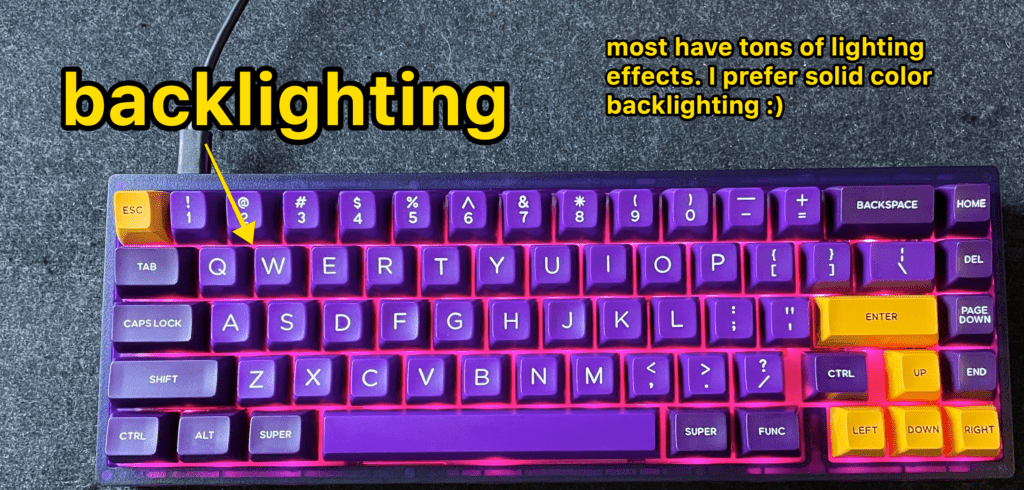
Most keyboards have RGB, And you can generally customize the different colors and effects to your liking.
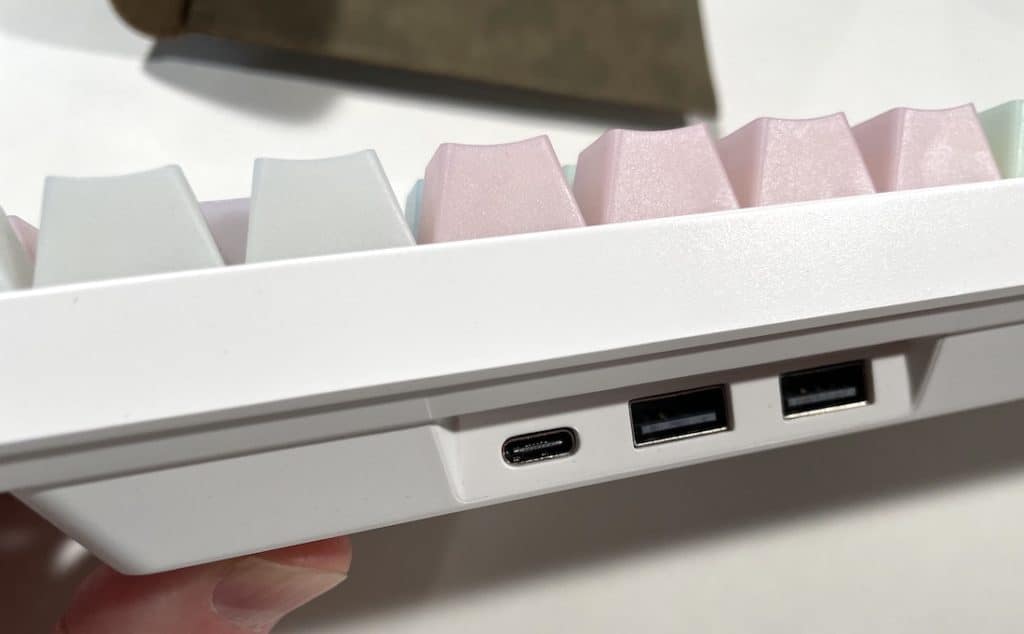
Wired vs Wireless (and USB ports)
Not all keyboards come with Bluetooth capabilities, so you’ll need to make a decision on what you want or need.
There are even a few keyboards that come with a 2.4 gigahertz dongle, though I don’t actually prefer these. Bluetooth usually works better.
Also, you can grab customized coiled USB cables in a variety of styles and colors!
USB Ports: Do you need additional USB ports on the back of the keyboard itself? They make those!
Do you want to create custom macros or edit keybinds? Check to see if your keyboard company has their own software, or supports popular firmware like QMK (or Via).
How much do mechanical keyboards cost?
You can spend as little as $50 for pre-built budget keyboards, but for customized mechanical keyboards, you will likely spend at least $150 or so.
The more you upgrade to premium materials for your keyboard cases, stabilizers, switches, and key caps, you could easily get to the $300-400 mark.
And of course, there are folks that spend upwards of $700-1,000 on their mechs. I’m not one of those people 😉
2 – Purchase the different parts of your keyboard
If you have picked out the size and features of your custom keyboard, you’re ready to shop for the different components.
Here is a breakdown of each piece of the mechanical keyboard puzzle:
Where can I purchase parts for a custom keyboard?
| KBDFans | My favorite sites for various components and keyboard kits! |
| MechanicalKeyboards.com | Mostly premades, but a good selection of keycaps |
| NovelKeys | Not a huge selection, but still a great site to browse |
| Drop | Mostly pre-built keyboards, but lots of premium keycaps. They’re pricey! |
| AliExpress | Can get parts for cheap, but shipping from China takes a loooong time. |
There are loads of sites. Those are just a few!
Keyboard Case
There are a few things to consider when purchasing the outer part of your keyboard (that everything sits in):
- Material
- Mounting Style
- The look you want
Case Materials
There are a few materials to choose from when it comes to the case of your keyboard:
| Material | Description |
|---|---|
| Plastic | The cheapest option, it’s sturdy but lightweight. Might get scratched a bit easier, and will sound…ok. |
| Aluminum | Aluminum is more expensive, but also stronger. These generally echo a bit more, often sounding “hollow,” (not necessarily a bad thing, it depends on your preference!) |
| Acrylic | These are similar to plastic cases, but often let a lot more RGB light through and come in several different colors! They’re not as durable as aluminum, but you’d never be able to tell the difference. |
| Wood | Self-explanatory. These are higher-end cases, but also beautiful! |
Case mounting style
How your PCB actually attaches to the case varies from keyboard to keyboard.
- Tray mount (most common by far)
- Top mount
- Bottom mount
- Plateless mount
- And GASKET mounts ( the most preferred, as they dampen the sound a bit better and feel nice).
If your case doesn’t say gasket mounted, it’s most likely a tray mount.
PCB
A PCB (printed circuit board) is the computery-looking motherboard of your keyboard. Your USB cable will plug into this, and your switches will attach to the top.
Choosing a PCB is straightforward, but there are important things to consider:
- Compatibility with your case
- Soldered vs hot-swappable
- The layout
- Features like RGB & QMK support!
Check out our complete QMK tutorial here, btw!
Compatibility
First, make sure that your PCB will fit inside your case. You can’t put a 75% PCB into a 60% case. You’ll also want to check your mounting style to make sure your PCB will correctly screw into case.
Pro Tip: When you go to purchase a case, you will often see recommended PCB options somewhere on the page:

Soldered vs Hotswappable PCBs: An important decision
| A hot-swappable PCB | You can easily attach and detach your switches. You simply snap in your switches, and to remove them, all you’ll need is a cheap switch puller. It takes 2 seconds. These generally only come in standard layouts (see below). |
| A non-hot-swappable PCB | Requires you to solder switches into it, which takes far more time and is a more permanent solution. (You can desolder switches to remove them, but you’ll have to take your entire keyboard apart, use a solder sucker, and it can be a pain). On the plus side, these “standard” PCBs often allow for more customizing. Want a split space bar or other weird configurations? It’s easier with these PCBs. |
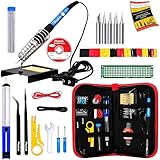
Also, you’d have to purchase soldering equipment, though you can generally find a cheap soldering iron kit on Amazon.
If this is your first custom keyboard, we recommend paying a little extra (often only $10-15 extra) to get a hot-swappable PCB. They’re easier to work with and far more flexible.
RBG Backlighting, USB ports, and firmware support
You’ll want to check PCBs for the feature you want! These are usually listed on the product pages.
Mounting Plate
For most mechanical keyboards (but not all), there’s a stiff plate that sits on top of the PCB, which the switches will sit on top of.
These come in loads of different materials, like
- Polycarbonate
- Aluminum
- Brass
- Way more.
This isn’t a big decision for beginners, so make sure you’re getting a plate that works with your case & PCB. Look on the sales pages of these items and they’ll tell you which components match the plate/PCB/case.
Stabilizers
Looking for more keyboard mods? Read this post.
The larger keys on your keyboard require additional support beyond a single switch, called stabilizers.
- Space bar
- Enter key
- Shift key
- Etc
You can purchase stabilizers in little packs based on the size of your keyboard (different layouts have different stabilizer needs).
The most important factor should be making sure your “stabs” are compatible with your PCB/plate. But, there are different mounting options:
| Stabilizer Type | Description |
|---|---|
| Screw-in | Generally preferred. These screw right into your PCB, and are usually the most “stable” stabilizers. Less rattle = good for typing and for sound! |
| Plate-mounted | Stabilizers that attach to the plate, not the PCB. These aren’t as stable, and can often rattle or shake. |
| Snap-in | Rather than screwing in, these snap in. Again, these are less secure and aren’t preferred. |
Compatibility is key here! If you’re going the hot-swappable route, most of those PCBs require plate-mounted stabs.
Switches
Mechanical keyboard switches are where your new keyboard starts to really get customized.
There are a TON of different switches across the mech communities, and if you’d like to go deeper into switch options, check out our comprehensive switch guide here.
Click here to check out our complete deep-dive on keyboard switches!
What ARE keyboard switches?
Switches are the box-looking things underneath each keycap (that connect to the PCB). These are the “mechanical” components that actually trigger key activation (called “actuation.”).
Switches have several parts, and are referred to in terms of color.
- Stem – These are usually colored by the name (“red switches” usually have red stems). They connect to the underside of the keycaps, and press down the…
- Spring – Springs provide resistance when you press down the key.
- Housing – The outer part of the switch, there’s a top and bottom housing. To lube switches, you’ll take these apart to reveal the stem and spring.
Switches are one of the most important customizations you can do for mechanical keyboards, as they greatly alter the feel and sound!
There are three broad categories of switches:
- Linear
- Tactile
- Clicky
| Switch Type | Appearance | Color | Sound/Feel |
|---|---|---|---|
| Linear switches | Smooth all the way down and back up | Red, Yellow, Black | Generally softer |
| Tactile | There’s a tiny bump halfway-ish through the keystroke, giving your fingers tactile feedback that the key was actuated | Brown, clear | Slightly louder, generally more “clack” than “thock” |
| Clicky | The same tiny bump as tactile switches, but with an additional “click” sound | Slightly louder, and with more, well, clicking |

Beginner Switch Recommendations:
There are thousands of switches out there, and it can be overwhelming to sort through as a beginner.
Here are some tried and tested brand names to look for
- Cherry MX (this can get confusing, as “cherry” and “mx” also refer to the style of switch housing and stem).
- Gateron: Your budget friendly option
- Kailh : Great switches, but note that you’ll need a different type of switch opener to open these. The housings connect differently.
- Akko: Budget-friendly, but solid. They have “Kailh-style” housings, same as the Kailh switches
If you’re not sure and don’t care, we recommend starting with a tactile switch, probably brown!
There’s seriously no wrong answer here though. Feel and sound come down to personal preference.
Click here to check out our full guide to mechanical switches.
Keycaps
Keycaps are plastic parts you touch of course, and are the easiest way to modify the look of your board!
Not all keycaps were created equally though. You should choose keycaps based on…
- The design (obviously)
- Material
- Profile
Though you can find keycaps in weird materials (like wood or metal), you’ll see these two types of plastic:
- ABS = Shiny and smooth material. Generally a bit cheaper.
- PBT = More textured (mostly in appearance, they feel similar). More expensive (though not by much) and more durable.
If you’re new, stick to either one of these materials! They’re both solid.
Besides, it’s keycap profiles that make a bigger difference.

“Profile” mostly means “height and shape.”
Here are some common profiles:
| Profile | Description |
|---|---|
| SA | The tallest keycaps that also have a nice curve (all keycaps that contain the letters “SA,” i.e. ASA or DSA, generally have a curve on top |
| OEM | Medium height, slanted tops |
| Cherry | Medium-low height, most popular probably |
There are tons more, and I recommend playing around with this website to compare profiles!
The Keycap bottom line: First, search for keycaps based on design. Grab a style that suits you! Next, you might want to double-check the profiles just in case you do NOT want a high-profile keycap. Too high, and it would be an unpleasant experience to type on!
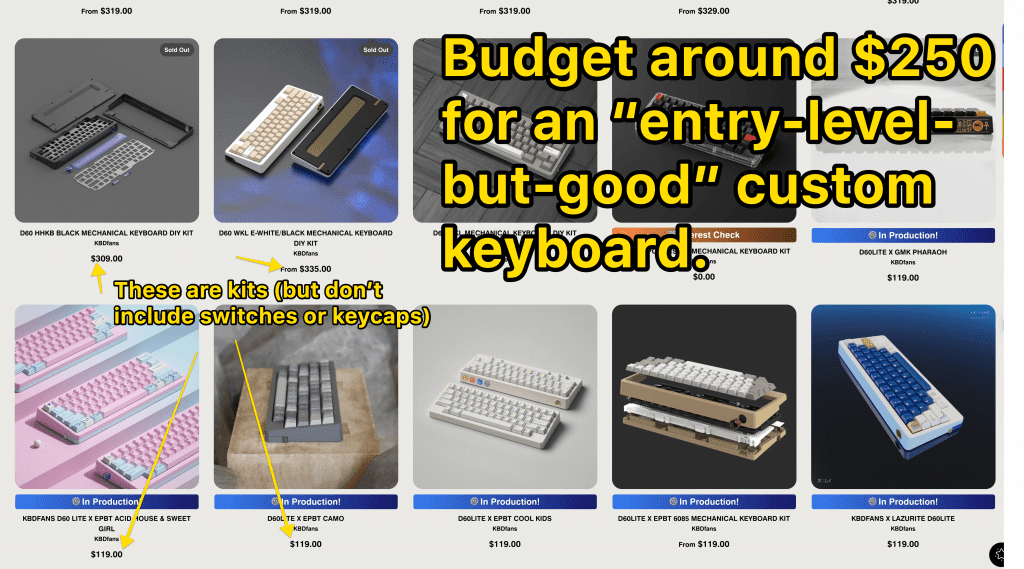
Here’s an example budget custom build:

I went on KBDfans and found the cheapest 60% components I could!
(This doesn’t include lube, films, or anything else. Extremely bare-bones)
If I tried to search for stuff on AliExpress, I could’ve gotten the price down to $80 or $90 even.
But frankly, these are the cheapest parts. You could build a FAR better mechanical keyboard for only $50 more, and it would be totally worth it! I’d upgrade the case material to aluminum and probably get better stabilizers.
You might check out buying a custom keyboard KIT!
Several sites (like KBDFans) sell bundles of DIY kits, which makes it easy to make sure your case, PCB, and plates are 100% compatible. (Nothing comes assembled, and they often offer the option to include foam and other accessories!)
These kits usually don’t come with switches or keycaps.

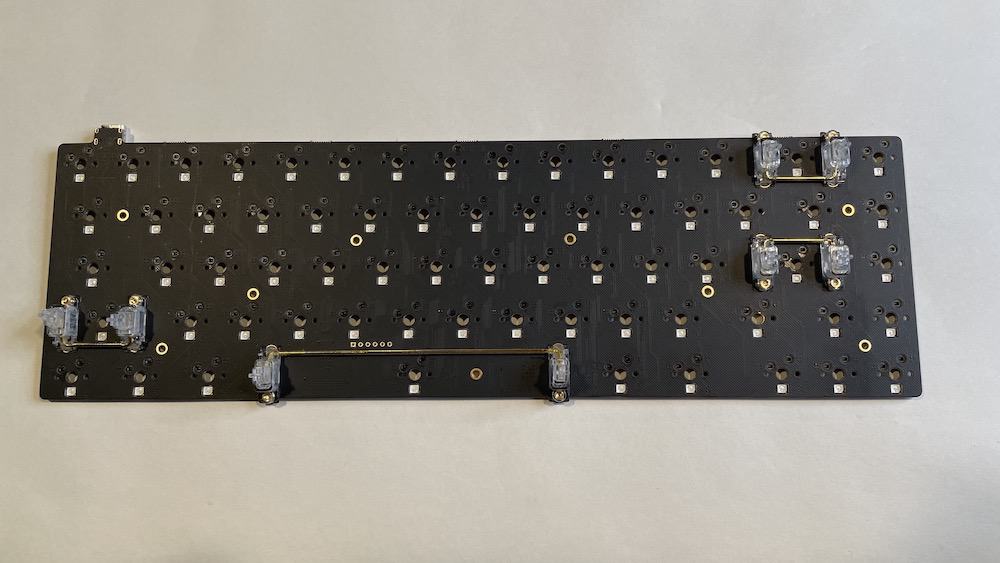
3 – Unpack your components and test your PCB
Actually, the next tech would technically be “wait for your custom keyboard to arrive,” as shipping can often take a hot minute ????
When you components arrive, go ahead and find a nice workspace (this process could take longer than a day, FYI!).
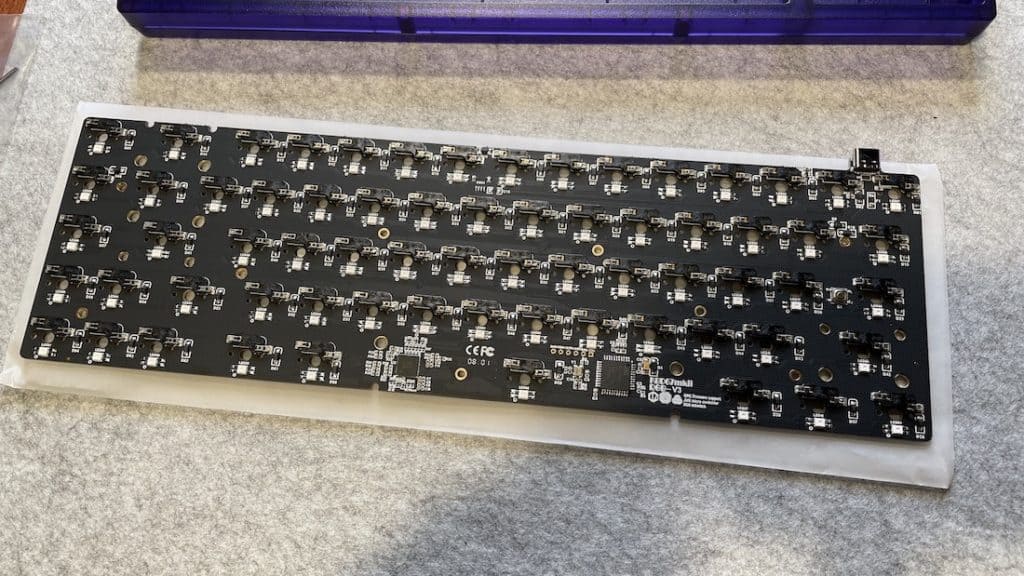
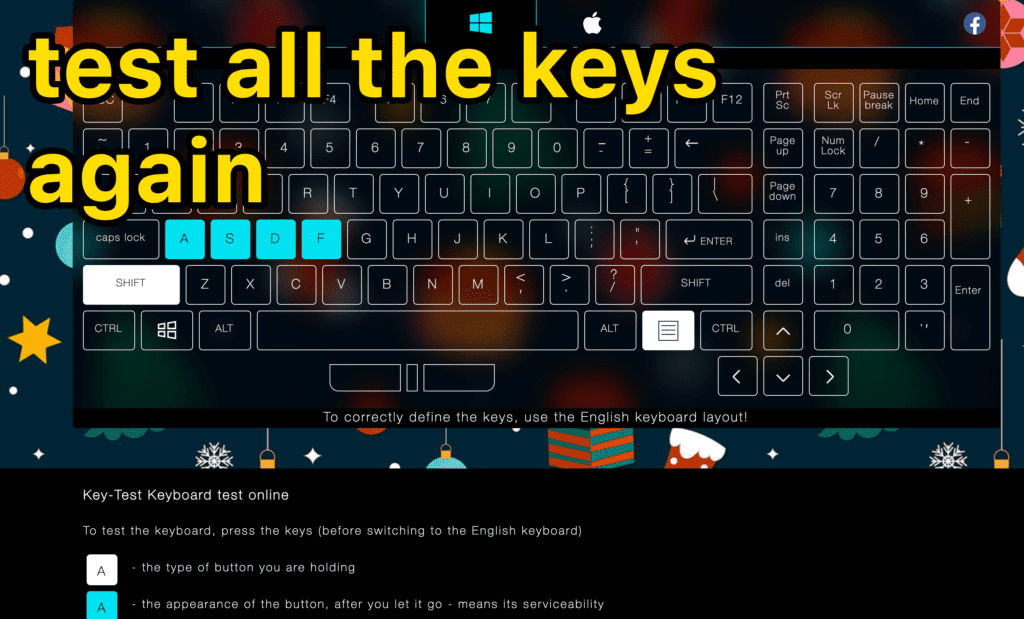
Then plugin your PCB and test it.
- Grab some tweezers
- Grab a USB cord and plug your PCB into your computer
- Open a keyboard testing tool like http://en.key-test.ru/ (or Via) or https://www.keyboardtester.com/
- For every key, put both sides of your tweezers on the PCB “pads” (see below)
- If you don’t see that the key activated right away, you might try a few more times moving your tweezers around a bit.
- If it STILL doesn’t work, you might have a faulty PCB, and you should return it!
PCB pads = the two diagonal holes that your switch pins would go into!

Your PCB might look different than mine! (In fact, it likely will. Just do your best!)
Test each key. If everything is good to go, it’s time to build your keyboard!
4 – Install Stabilizers (And Optionally Lube and Clip Them)
As we’ve mentioned, stabilizers exist to support the larger keys (space bar, shift key, etc), and the size/layout of your keyboard will determine how many stabilizers you ordered (and what size).
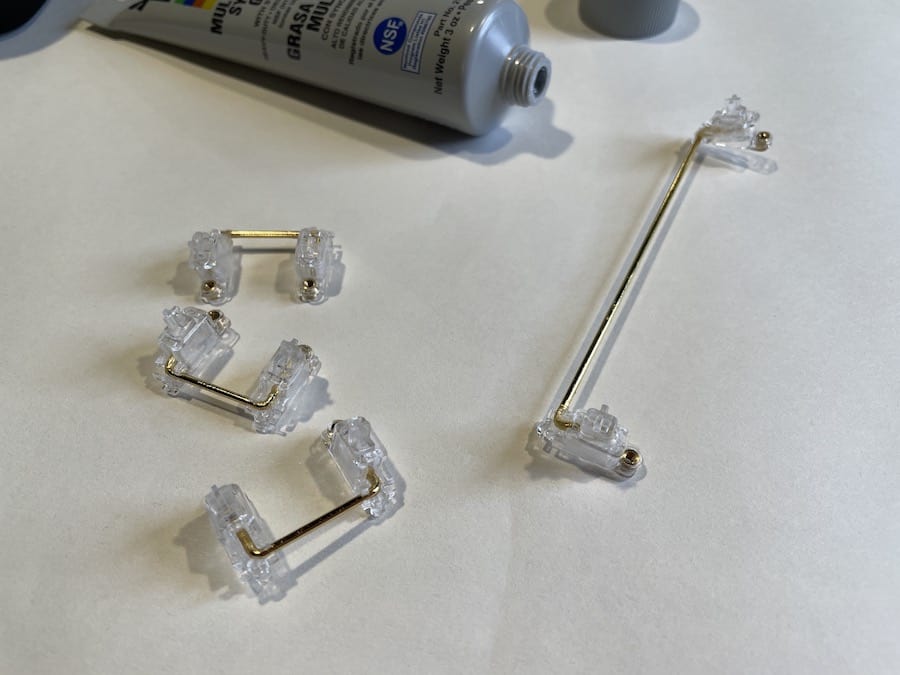
Most stabilizers have a few different parts.
- The bar
- The housing
- An insert (like a switch stem)
Before you install your stabilizers, however, let’s review the more common modifications.
Should you modify your stabilizers, or use them out of the box?
“Modding” in this case refers to…
- The band-aid mod
- Clipping your stabilizers
- Lubing your stabilizers
These all have one goal: To improve the feel and sound. Stabilizers can often rattle and scratch, or be much louder than other keys on the same keyboard.
The good news is that you don’t have to do all three of these! (or any of these, actually). You could just clip and lube. It’s all personal preference.
The band-aid mod
On some keyboards, the stabilizers will “bottom out,” i.e. go all the way down, and actually hit the PCB!
The “band-aid” mod adds some small adhesive material to the exact spots where the stabilizers would hit the PCB, dampening the sound.
Note: Not all keyboards need this mod! In fact, the band-aid mod doesn’t actually make that much of a difference (just my personal opinion!). You should check your setup to see if the stabilizers actually hit the PCB. If they don’t, you can likely skip this mod)
The process:
- Grab some band-aids (the fabric kind)
- Cut tiny strips out of the sticky parts of the band-aid (you can trash the center part of the band-aid)
- Place them down where your stabilizers bottom out (see the video below)
- Optionally add a bit of lube on top (I’ve never done this)
Since this is a small modification and most beginners skip it, I’ll refer you to Taeha on YouTube if you want to do this.
Also, this video covers clipping and lubing as well!
Clipping your stabilizers
On your stabilizer inserts, there are a few parts that don’t actually NEED to be attached, and usually cause wobble and shaking.
But you can clip these off!
It’s not difficult, but be careful that you don’t accidentally cut off the wrong part of the stabilizer!
Refer to the video above to see this in more detail.
Lubing Your Stabilizers
When we speak of lubing, we are referring to applying some lubrication to the different parts of our keyboards that will touch against each other.
This will generally make all the mechanical things function more smoothly, and yield a better feel and sound.
Lubing switches and stabilizers is an optional step, but it is highly recommended!
What lube do I need for switches & stabilizers?
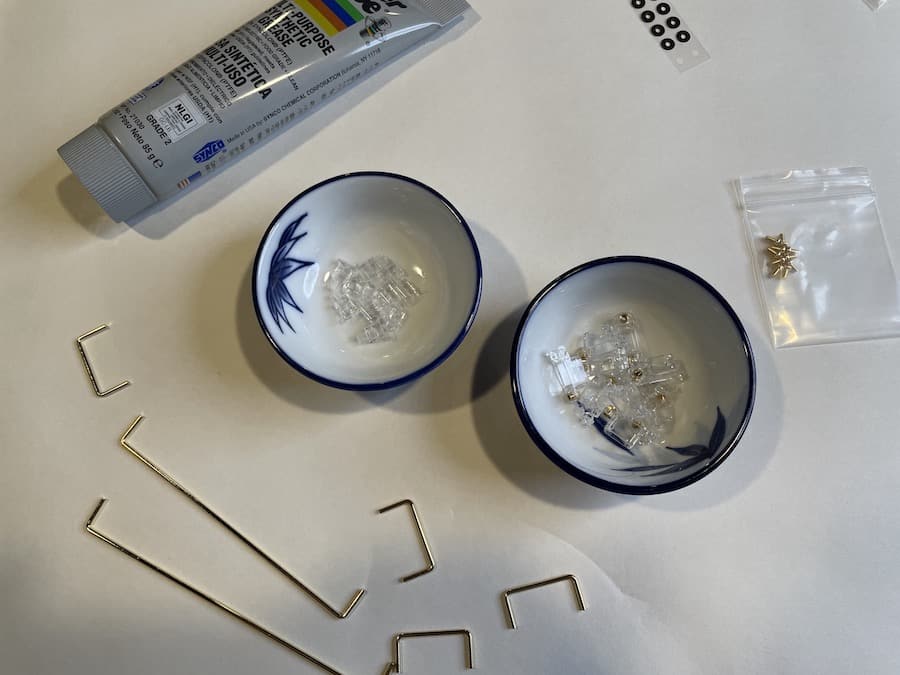
We will talk more about lubing switches below (as your choice of lube will depend on switches you have!), but for stabilizers, I recommend dielectric grease!
Grab a bottle of Superlube at your local hardware store (I bought mine at Ace Hardware, but here’s an even cheaper alternative on Amazon.)
Here’s the lubing process for stabilizers:
- Disassemble the stabs
- Lube the inside surface of the stabilizer housing (we recommend using a small paintbrush) Do not lube the outside of the housing.
- Push the insert back in the housing
- Lube the stabilizer bar. You’ll want to cover the ends (the parts that go back into the housing). You can use a thin layer, and use a paintbrush (or simply stick the bar ends into the can of grease!)
- Re-insert the bar into the stabilizer.
Again, check the video above for more details.
At this point (whether you clipped your stabs and/or added some band-aids to the PCB), you’re ready to install your stabilizers!
Install Your Stabilizers Into the PCB/Plate
This step will be different depending on your mounting setup!
We suggest referring to the documentation that came with your stabs (probably on their website somewhere). Else you can probably head to YouTube and find a tutorial specific for YOUR stabilizers.
So screw (or snap) them onto your PCB/plate, and you’re ready to move on to the next step!
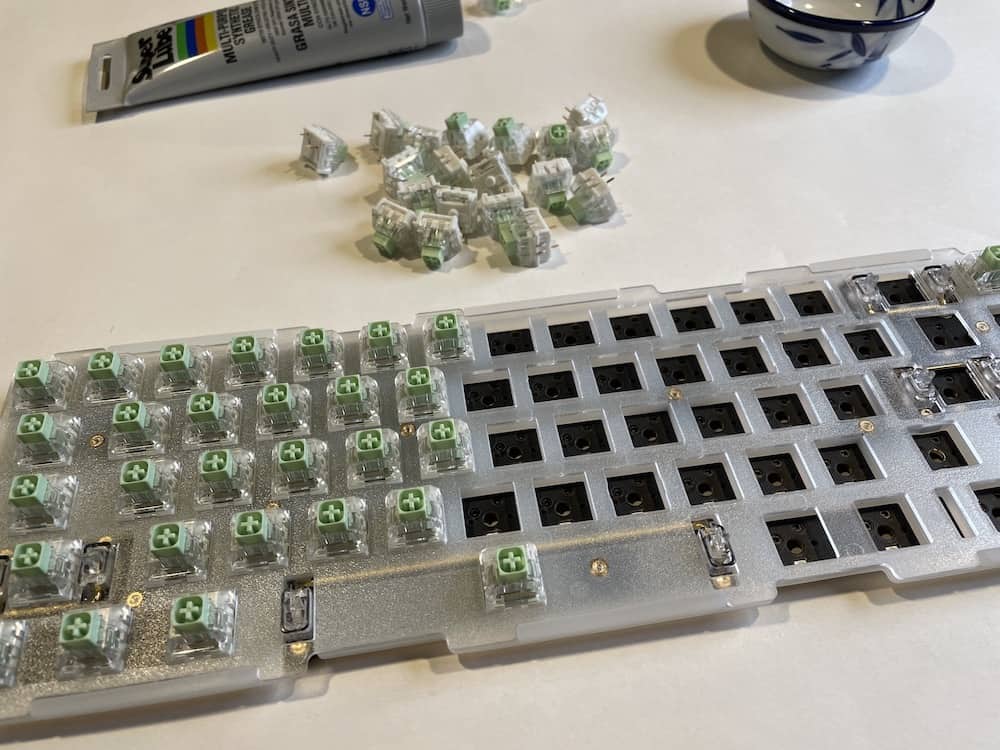
5 – Install Your Switches (And Optionally Lube & Film Them)
Time to move on to switches.
Before we talk about installing switches, let’s review the two important mods:
- Lubing
- Filming
These are both optional (and if you have a hot-swappable PCB, you could easily remove the switches later on and mod them! No need to do it now).
Lube your switches
Similar to lubing stabilizers, the goal is to lubricate the different parts of the switch that will rub against each other. Reducing friction will make typing feel way smoother (and it also generally yields a better sound, though it’s a small difference for most switches).
What’s you’ll need:
- Lube
- A switch opener
- A small kid-sized paint brush
- Optional: A 4-claw pickup tool (to hold stems)
- Optional: A lubing station, or a small bowl or two to place your switch parts.
What is the best lube for keyboard switches?
The short answer is Krytox 205G0. There are tons of different lube variations (viscosity!), which you can research more here if you’d like.
Do all switches need lubing?
No! It’s not recommended to lube clicky switches, as it might actually remove the “click!” If you’re not careful, there’s also a chance that you can “lube out” the tactile bump in tactile switches (usually be applying too much lube or being sloppy).
Here’s an overview of the switch lubing process:
- Open your switches (one by one. Yes, this process can take several hours!)
- Separate the stem, spring, and housing units
- Apply lube (lightly!) to the inside of the bottom housing
- Apply lube to the spring (some people do “bag lubing,” which means putting several springs in a ziploc bag, inserting some lube, and shaking the bag)
- Place the spring in the bottom housing
- Lube the stem (watch the video below on this)
- Place the stem on the spring (making sure it’s facing the right direction)
- Optional: Lube the insides of the top housing
- Assemble the switch
This is a tedious process but an important mod, so please watch the video below to make sure you get it right!
Filming your switches
A switch film is a tiny piece of plastic-y material that you insert between the top and bottom housing of a switch, to reduce wobble!
You can grab these on most keyboard stores, or on Amazon for cheap.
Not all switches even need these! Click here to check out our guide on how to film keyboard switches.
Installing switches into a hot-swap PCB:
If you purchased a hot-swappable PCB, you can skip this next section about soldering.
Also, you can totally wait until you’ve already assembled your keyboard before you put in your switches! Your switches will simply snap right into the PCB. You should move on to assembling your plate & PCB.
Soldering your switches
If you have a non-hot-swappable PCB, it’s time to connect the following components:
- Switches
- Plate
- PCB
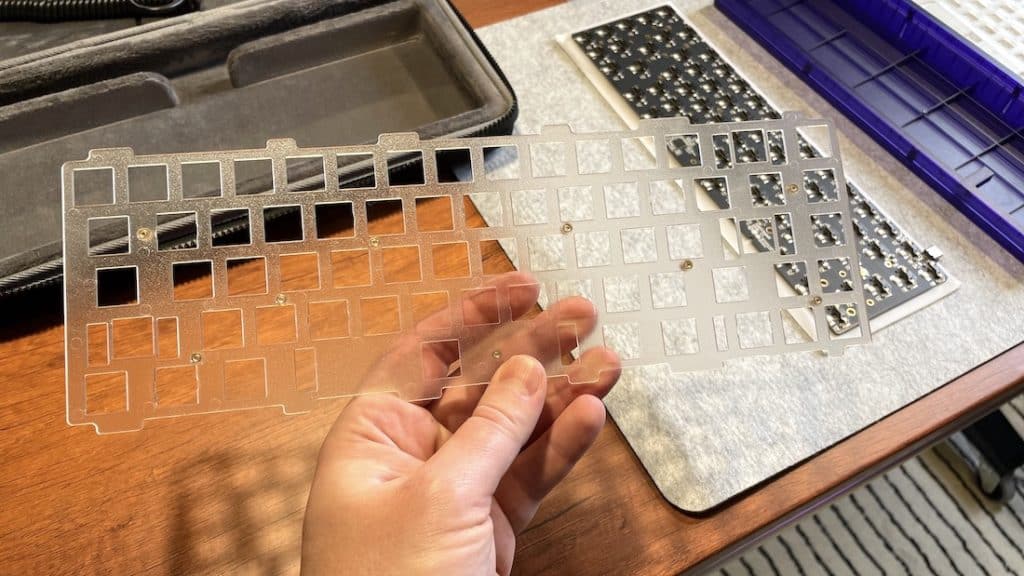
The first step is lining things up:
- Align the plate and PCB (roughly)
- Insert each switch into the plate, with the switch pins going into the PCB (be careful not to bend the pins!
Once all of your switches are installed and all three components are lined up and stable, it’s time to solder.
If you have never soldered anything before, you’re definitely going to want to watch some YouTube videos.
Here my own tips:
- Watch YouTube videos to learn what soldering is, and to find the exact spots you need to be soldering switches to!
- Do this outside or in a very well-ventilated area. Wear goggles. This isn’t a nice-to-have, this is a MUST-DO.
- Go slow. It’s tedious, but you don’t want to mess with de-soldering and fixing mistakes. Better to take it slow and do it right!
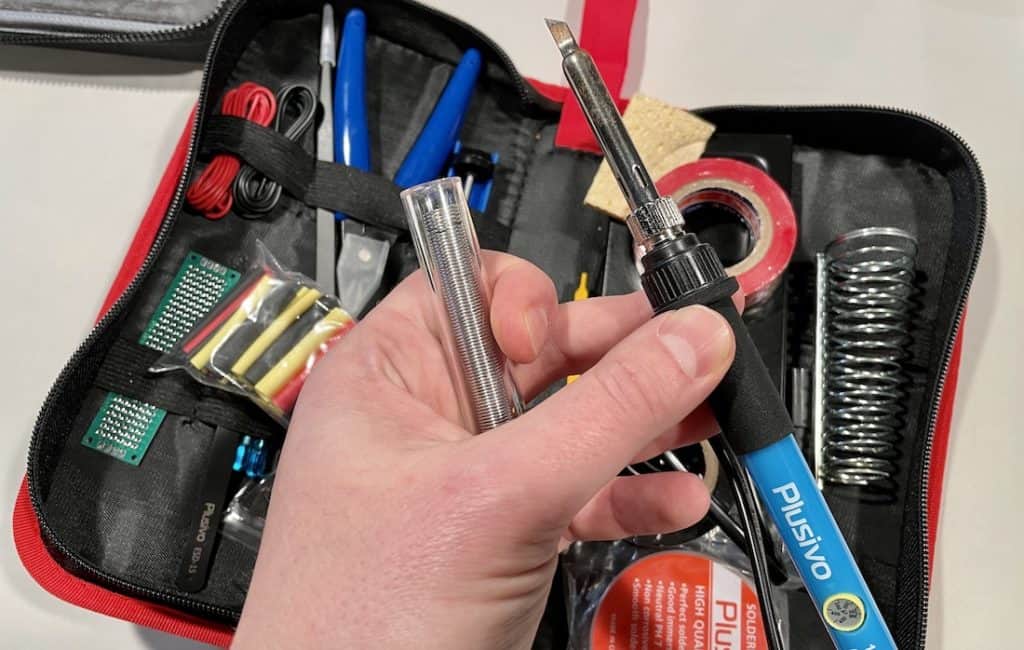
- I get by with a really cheap soldering iron kit on Amazon, which came with everything I needed and then some! I’ve soldered two keyboards and still have plenty of the wire left over.
Once you’re done soldering the switches in, you might want to plug-in your PCB again and re-test the switches! Now is the perfect time to de-solder if you messed anything up.
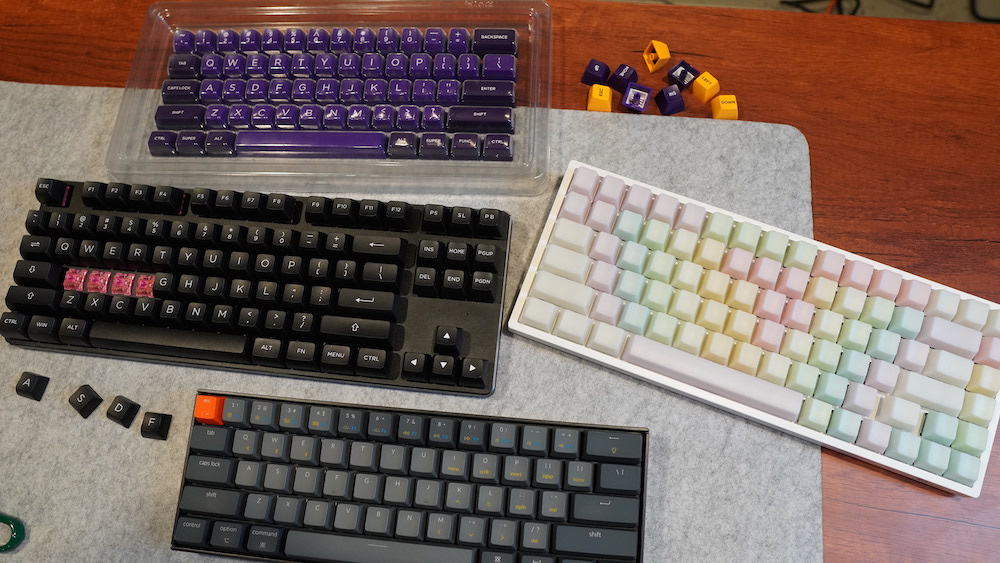
6 – Install sound dampening foam (optional)
When there is “dead space” air inside of your keyboard, there will be echo, making it sound more hollow.
You can add foam to your case to reduce the reverberation and make it sound better.
- Between the case and the PCB
- Between the PCB and the plate
Click here for our full foam mod guide!

Many people recommend sorbothane foam, but neoprene foam is a bit cheaper.
(Honestly, you can also use simple packing foam from Home Depot. The keyboard in the picture above is using a drawer liner!)
Pay attention to the vertical space you need to fill up in your keyboard–don’t buy foam that’s super thick, or else your PCB won’t fit in.
7 – Assemble the PCB & Plate Into the Keyboard Case
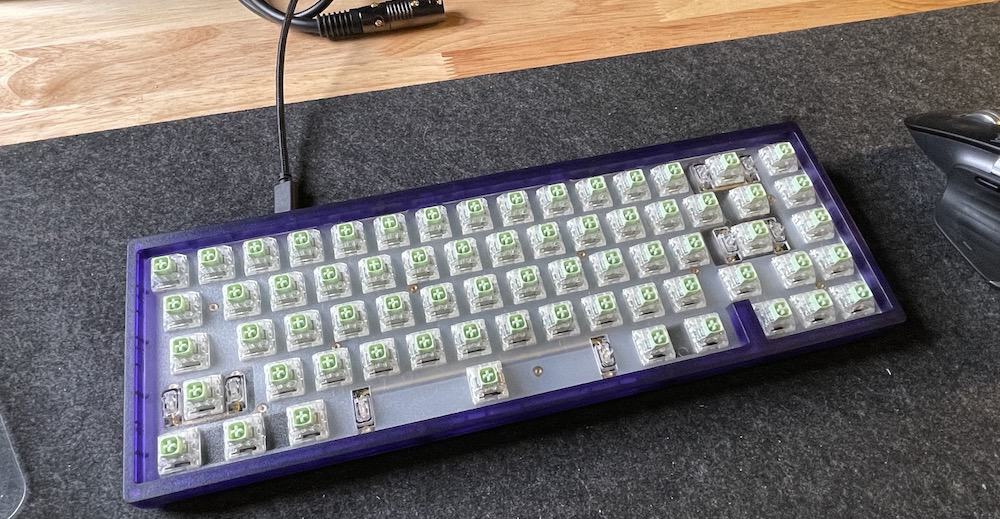
If you’ve got foam installed and the rest of the “internal” parts of your keyboard ready–it’s time to reassemble the case!
This step will look different depending on your setup, but it generally involves:
- Mounting the PCB/plate inside the bottom of the case and lining everything up
- Screwing everything together
Follow your keyboard’s specific instructions, and this should be simple.
8 – Install your keycaps
Next, you’ll simply press your keycaps onto the switches!
Unless you have all the key placements memorized (it can be surprisingly tough to figure out if you haven’t studied keyboard layouts), you’ll need a reference.
I usually head to the keyboard (or keycap) manufacturer’s website and find pictures of their completed boards (to see exactly what keys are where).
Make sure the keycaps are pressed all the way down onto the switch stem! You don’t want any extra wobble or scratchiness just because the keycap wasn’t pressed down hard enough.
(Some keycaps are worse than others when it comes to “fit.”)
9 – Test everything
Woohoo! Your custom keyboard is likely done! (especially if you double-checked that the PCB worked properly and made sure your switch pins were installed without bending).
Plug your keyboard in via the USB cord and fire up http://en.key-test.ru/ again (or head to a popular typing test website like MonkeyType), and make sure all keys are working.
If all keys are firing, you’re done! Enjoy your new mechanical keyboard!!
10 – (Optional) Program Your RGB/Lighting and Keyboard
You’ll probably want to customize the way your RGB backlighting looks & behaves.
There are generally two ways to do this:
- Via the software (that came with the keyboard, or QMK or Via if your PCB supports it)
- Via the keyboard itself
If your keyboard supports specific software from the company, use that as you please!
Oftentimes, there will be shortcuts on your keyboard to program:
- the lighting effects
- the speed at which they happen
- the colors
For example, the GMMK I’m typing on uses the Function key + Insert, Home, PageUp, Delete, End, and PageDown.
Again, check your keyboard’s specific instructions.
Customizing Macros, Keystrokes, Layers, and More Software Options
This is more advanced, but there are also 3rd softwares like QMK (and Via, an app which controls QMK coding more easily).
Even outside of the mechanical keyboard community, there are other apps (that you can use regardless of keyboard) like Keyboard Maestro (Mac only) or AutoHotKey (Windows).
PSST: MacOS user? Check out our “best for Mac” mechanical keyboards here!
Focusing on how to build a custom gaming keyboard? You’ll DEFINITELY want to learn software to customize macros.

Custom Keyboard: Frequently Asked Questions
Why Build a Custom Keyboard?
Custom mechanical keyboards often yield a better typing experience and can turn into a fun (and addicting) hobby! You can customize the look, feel, and sound of any mechanical keyboard, and the end result is definitely rewarding.
Can You Make Custom Keyboards?
Yes! You can order all the keyboard components separately (Keyboard case, PCB, plate, switches, keycaps, USB cord) and assemble them. Doing this opens up limitless options for customizing the size, design, sound, and feel of a keyboard!
You can also build your own keyboard kit–meaning you’ll buy a DIY bundle that includes pre-matched individual components (so you can rest assured that the different pieces will be compatible with one another).
Related: How to paint your keyboard (spray painting guide)
You’ve built a keyboard. What’s next?
Enjoy typing on it, of course!
If you ever feel the itch to get back into the process of building custom keyboards, here are some easy (and more affordable) next steps:
- Order different keycaps to try a new look
- Try out a different switch type (linear vs tactile vs clicky)
- Check out some popular accessories to accompany your keyboard, like a wrist rest, coiled USB cable, or even artisan keycaps!
That, and maybe follow along with the KeebNews YouTube channel for even more keyboard fun ????